
- Tools and materials you need before you start
- Which thermostat type you have changes your calibration steps
- How to tell if your thermostat is actually inaccurate
- Safety, wiring, and compatibility checks before you open the cover
- Step-by-step calibration for manual, digital, programmable, and smart thermostats
- How long to wait before trusting your results
- When to call a professional HVAC technician
- My quick checklist before you call anyone
- Get your thermostat and HVAC system checked by Upright Construction & HVAC
- FAQ
- Sources
Yes, most thermostat accuracy problems are fixable by a homeowner, and the first step is simple: place a trusted thermometer next to your thermostat and compare the two readings after 30 to 60 minutes in steady conditions. If the gap is small, a quick offset adjustment usually solves it. If you see odd wiring, a blank display, or a system that short cycles no matter what you try, stop and call a licensed pro.
TL;DR:
- Most thermostat accuracy issues are caused by placement, with common problems including drafts, sunlight, or obstructed airflow that require location adjustments rather than calibration.
- To fix calibration, compare the thermostat with a trusted thermometer for 30 to 60 minutes and make small, incremental offset changes based on the type of thermostat.
- Confirm system compatibility with a C-wire or adapter before calibration, especially with smart or heat pump systems that need continuous power.
- If offsets persist despite placement and calibration adjustments, or wiring appears unusual, it is best to call a licensed HVAC professional for diagnostics.
- Simple DIY fixes like repositioning the thermostat or replacing batteries solve more issues than most homeowners expect, often avoiding unnecessary service calls.
Tools and materials you need before you start
A clean test starts with the right instruments. Skip this step and you risk “fixing” a thermostat that was never broken in the first place.
- A digital probe thermometer or a small, reliable room thermometer placed where the thermostat sits.
- An infrared thermometer or a basic data logger if you want to track temperature swings over several hours.
- A screwdriver, fresh batteries, a small level, and your phone’s camera to photograph wiring before you touch anything.
- A multimeter or a C-wire adapter if your system lacks a dedicated common wire, since smart thermostats often need steady power.
Always switch off power to the HVAC system at the breaker before opening the thermostat cover. A few minutes of prep prevents a shorted control board or a damaged compressor.
Which thermostat type you have changes your calibration steps
Not every thermostat adjusts the same way, so identifying your type first saves you from chasing the wrong menu or dial.
- Mechanical (mercury or bimetallic coil): rare today, but adjustable with a small calibration screw inside the cover.
- Basic digital: usually has a hidden offset or calibration setting in a menu, adjustable in small increments.
- Programmable: same offset logic as basic digital, but schedules must be stable before you trust any reading.
- Smart or learning thermostats: calibrated through a manufacturer app, sometimes using sensor averaging across rooms.
- Remote-sensor systems: rely on one or more satellite sensors instead of (or alongside) the wall unit itself.
Heat pump systems and many smart thermostats need a C-wire for consistent power, so confirm compatibility before assuming a reading is wrong.
How to tell if your thermostat is actually inaccurate
A few patterns separate a genuine sensor problem from a placement or airflow issue.
- Watch whether the offset is steady (always 3 degrees high, for example) or jumps around, since a consistent gap points to calibration while erratic swings point to drafts or sun exposure.
- Note short cycling, uneven temperatures between rooms, or climbing energy bills with no change in habits.
- Set a thermometer beside the thermostat and let both settle for 30 to 60 minutes under steady conditions before comparing.
- Check two or three other rooms with a portable thermometer to see if the whole house runs warm or cold, not just one zone.
- Inspect vents and filters, since a closed register or clogged filter can mimic a thermostat problem by starving a room of airflow.
Distribution issues like blocked ducts often look exactly like a miscalibrated thermostat, which is why the check above matters before you touch any settings.
Safety, wiring, and compatibility checks before you open the cover
Before removing any thermostat, cut power at the breaker, not just at the unit. Photograph the wiring and the terminal labels from a few angles, and keep the old thermostat in case you need to reinstall it. Consumer Reports advises keeping the old unit and documenting wiring before any swap, since replacement carries real risk if wiring is misread.
- Label every wire with painter’s tape before disconnecting anything.
- Count the wires and compare them to your new thermostat’s compatibility chart if you’re installing a smart unit.
- If you see unfamiliar multicolored wire sets or more than five wires, treat that as a signal to slow down.
A guide on thermostat location and safe pre-repair checks walks through these same steps in more detail for anyone wiring a replacement themselves.
Pro Tip: If you’re missing a C-wire, try a C-wire adapter before running new wire through a wall, it’s cheaper and reversible.
Step-by-step calibration for manual, digital, programmable, and smart thermostats
Calibration steps differ by thermostat type, but the underlying method stays the same: measure, adjust in small steps, and retest.
Manual or mechanical thermostats. Tape a thermometer to the wall beside the unit and wait an hour. Remove the cover and look for a small calibration screw or a movable dial near the coil. Turn it in tiny increments, replace the cover, and wait another hour before checking again. Repeat until the two readings agree.
Basic digital thermostats. Most models hide an offset setting inside a menu, often labeled “calibration” or “temperature offset.” Adjust in steps of half a degree to one degree Fahrenheit, save the change, and give the system 30 to 60 minutes to settle before comparing again. Avoid jumping straight to a 3 or 4 degree offset even if that’s what the first reading suggests.
Programmable thermostats. Confirm your schedule is stable and not mid-transition before testing, since a thermostat actively ramping toward a setpoint will show a misleading reading. Make offset changes only after placement is confirmed as reasonable, then test during a hold period so the schedule doesn’t interfere with your comparison.
Smart or learning thermostats. Open the manufacturer’s app and look for a calibration or sensor-offset feature, which may average readings from multiple remote sensors instead of relying on the wall unit alone. Adding a remote sensor to a chronically hot or cold room often solves what looks like a calibration problem. Before installing, verify your system’s C-wire or power requirements so the thermostat doesn’t rely on inconsistent power-stealing.
- Write down the original setting before changing anything, so you can revert if needed.
- Adjust in small increments only, generally a half degree to one degree at a time.
- Recheck over several hours, and ideally over a day or two, before concluding the fix worked.
Pro Tip: Change one variable at a time: test placement first, then adjust offset, never both in the same session, or you won’t know which fix actually worked.
How long to wait before trusting your results
Give any adjustment 30 to 60 minutes to stabilize under steady indoor conditions before judging it. For a system-wide check, especially after a bigger change, monitor for 24 to 72 hours or review the runtime history many smart thermostats log automatically.
- Expect some built-in rounding: most thermostats display in whole degrees, so a 1 to 2 degree gap often falls within normal tolerance.
- ENERGY STAR requires qualified programmable thermostats to stay accurate within about 2 degrees Fahrenheit, which is a useful benchmark for what counts as “close enough.”
- If the same offset keeps returning after calibration and placement checks, the cause is likely airflow or a sensor fault rather than a simple setting.
Field tests referenced in building-science literature found temperature readings can vary by up to 5 degrees Fahrenheit depending on sensor type, sampling rate, and position, a reminder that two thermometers rarely agree perfectly, according to the Building Science Education guide.
When to call a professional HVAC technician
Some situations go beyond a thermometer and a screwdriver. Call a licensed technician when:
- Wiring looks unfamiliar, undocumented, or you’re not confident matching terminals.
- Offsets keep returning even after you’ve confirmed placement and made small adjustments.
- You suspect a heat pump, dual-fuel system, or refrigerant issue rather than a sensor problem.
- Relocating the thermostat would mean running new wire through walls.
Before the visit, gather photos of your wiring, your thermometer comparison notes, and a short timeline of when the problem started. A technician will typically run full diagnostics, correct any wiring faults safely, replace a failed sensor, or advise on relocating the unit for better airflow exposure.
My quick checklist before you call anyone
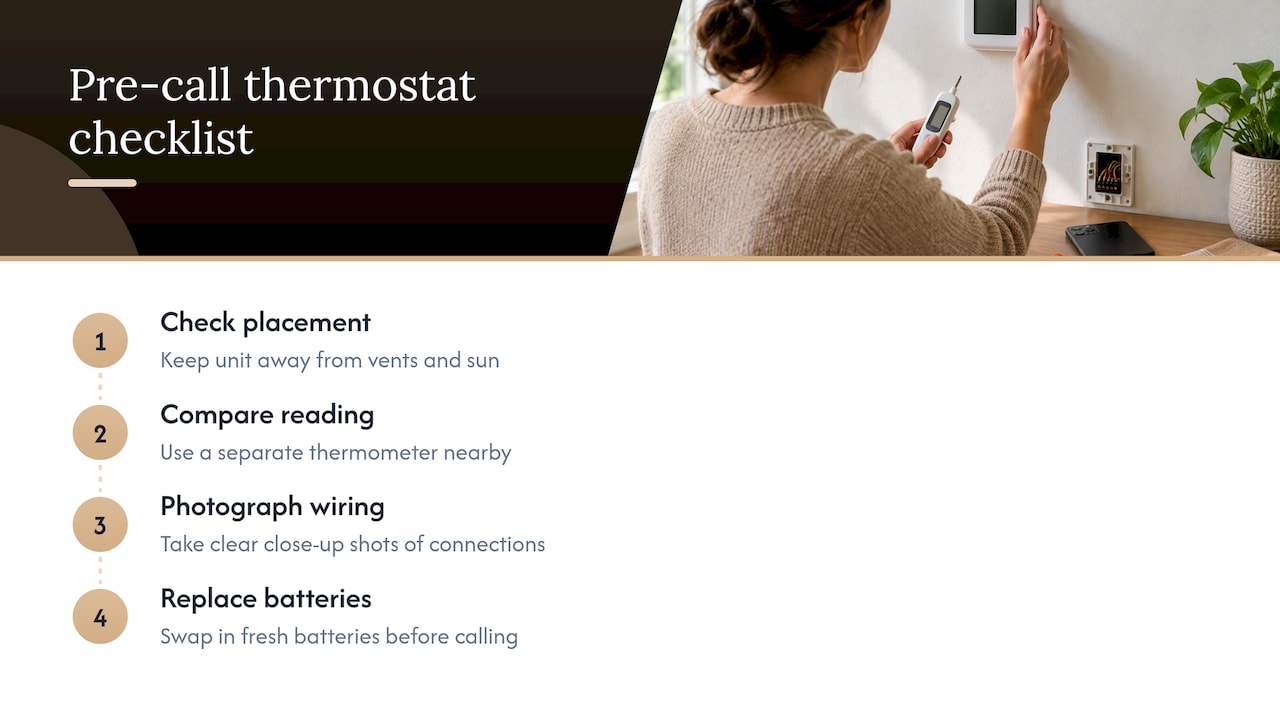
Before you call a pro, I always tell homeowners to run four checks first: confirm placement away from vents and sun, compare a thermometer reading, photograph your wiring, and swap in fresh batteries. Those four steps solve more “broken” thermostats than people expect.
When a problem goes past that point, our team shows up with the diagnostic tools to find the real cause and a clear, upfront quote before any work begins.
— Ernie M
Get your thermostat and HVAC system checked by Upright Construction & HVAC
When placement and offset checks don’t fully solve the problem, a professional diagnostic finds what’s really going on, whether that’s a wiring issue, a failing sensor, or a distribution fault hiding behind your thermostat.

We handle everything from thermostat wiring and smart-thermostat setup to full system diagnostics, and our Maintenance Plans catch sensor drift and airflow problems before they turn into bigger repairs.
- Thermostat wiring, replacement, and smart-thermostat installation.
- Full HVAC diagnostics when offsets keep returning after a DIY fix.
- Scheduled tune-ups that catch small issues early.
Reach out through our HVAC repair page for a diagnostic visit and a straightforward quote before any work starts.
FAQ
How do you fix an inaccurate thermostat?
Start by placing a trusted thermometer next to the thermostat for 30 to 60 minutes, then compare readings. If there’s a consistent gap, use the offset or calibration menu to adjust in small increments and retest, since Consumer Reports notes that placement, not sensor failure, is the more common culprit.
Does my thermostat need to be calibrated?
Not always. Many apparent accuracy problems actually come from placement near vents, windows, or direct sunlight rather than a true sensor fault, so check location first before assuming calibration is needed.
How long does it take for a thermostat to calibrate?
A single adjustment typically needs 30 to 60 minutes to stabilize before you can trust the new reading. For whole-system verification, plan on monitoring over 24 to 72 hours or reviewing your smart thermostat’s runtime history.
How do I tell if my thermostat is accurate?
Compare it against a separate, reliable thermometer placed beside it under steady indoor conditions. A gap within about 2 degrees Fahrenheit generally falls within the tolerance ENERGY STAR applies to qualified programmable thermostats.