
- Quick Checklist: Six Fast Checks You Can Run in 5 to 10 Minutes
- Common Causes Explained: How to Read the Symptoms
- Homeowner-Safe Checks and Simple Fixes
- When to Call a Licensed HVAC Technician
- What Ernie Sees Over and Over on Mini Split Calls
- How Upright Construction & HVAC Gets Your Heat Back On
- Sources
- FAQ
- Recommended
When a mini split won’t heat, the cause is almost always one of five things: the wrong mode setting, a tripped breaker, a dirty filter, a frozen outdoor coil, or low refrigerant. Start with the free fixes. Run through the settings and airflow first, then power-cycle the system. If it still blows cold air after that, stop touching anything electrical or refrigerant-related and call a licensed technician.
TL;DR:
- The most common causes for a mini split not heating are incorrect mode settings, a tripped breaker, a dirty filter, a frozen outdoor coil, or low refrigerant, which cannot be fixed DIY if unresolved after basic checks.
- Symptoms like ice buildup on coils, continuous running of the compressor in the wrong mode, or refrigerant hissing indicate issues such as low refrigerant, stuck reversing valves, or refrigerant leaks that require certified technicians.
- Homeowners can safely power-cycle the system, clean filters, and allow ice to melt naturally, but must avoid tampering with refrigerant lines or electrical components inside outdoor units.
- Call a licensed HVAC technician immediately if you observe persistent ice formation, no compressor activity, oil stains, burning smells, or recurring breaker trips, as these signal serious system faults.
- Regular maintenance, including monthly filter cleaning and annual professional tune-ups, helps prevent most heating failures and extends system longevity.
Quick Checklist: Six Fast Checks You Can Run in 5 to 10 Minutes
Before you assume the worst, work through these checks in order. Most no-heat calls trace back to one of the first three items on this list.
- Confirm the mode. Make sure the remote or thermostat is actually set to heat, not “auto” or “dry,” and that the set temperature is a few degrees above the current room temperature. It sounds obvious, but a remote bumped into fan mode is one of the most common reasons a mini split isn’t blowing hot air.
- Check the indoor fan and remote batteries. Stand near the indoor unit. If you feel no airflow at all, weak remote batteries or a frozen display can stop commands from reaching the unit.
- Check the breaker and outdoor disconnect. Flip to the breaker panel and look for anything tripped, then check the disconnect box near the outdoor unit. Power-cycle both units off for 60 seconds, then back on.
- Pull the filter and check for blockage. A clogged filter chokes airflow across the coil, which is one of the most frequent reasons a mini split runs but never actually warms the room.
- Walk outside and look at the coil. Ice buildup, oil residue near the line set, or debris jammed against the fins all point to specific problems covered in the next section.
- Write down any blinking lights or codes. Count the blink pattern or note the exact code on the display. Codes vary by brand and model, so photograph the display before calling anyone.
Common Causes Explained: How to Read the Symptoms
Not every no-heat problem looks the same, and the symptom pattern usually tells you which system is failing before a technician ever shows up.
Settings versus a stuck reversing valve look similar at first glance but behave differently. A wrong setting means the unit runs quiet and does nothing. A stuck reversing valve means the compressor and fan both run, but the air coming out stays cold or lukewarm no matter how high you set the temperature. That valve is what switches the refrigerant flow direction between cooling and heating, and when it sticks, the system keeps performing whichever mode it was last stuck in.
Frozen evaporator coils happen when airflow is restricted or refrigerant charge is low. Either problem slows heat exchange enough that condensation on the coil turns to ice instead of draining off, and ice on the coil chokes airflow even further, which makes the icing worse in a loop. A little frost after a defrost cycle in freezing weather is normal. Ice that keeps coming back within hours is not.
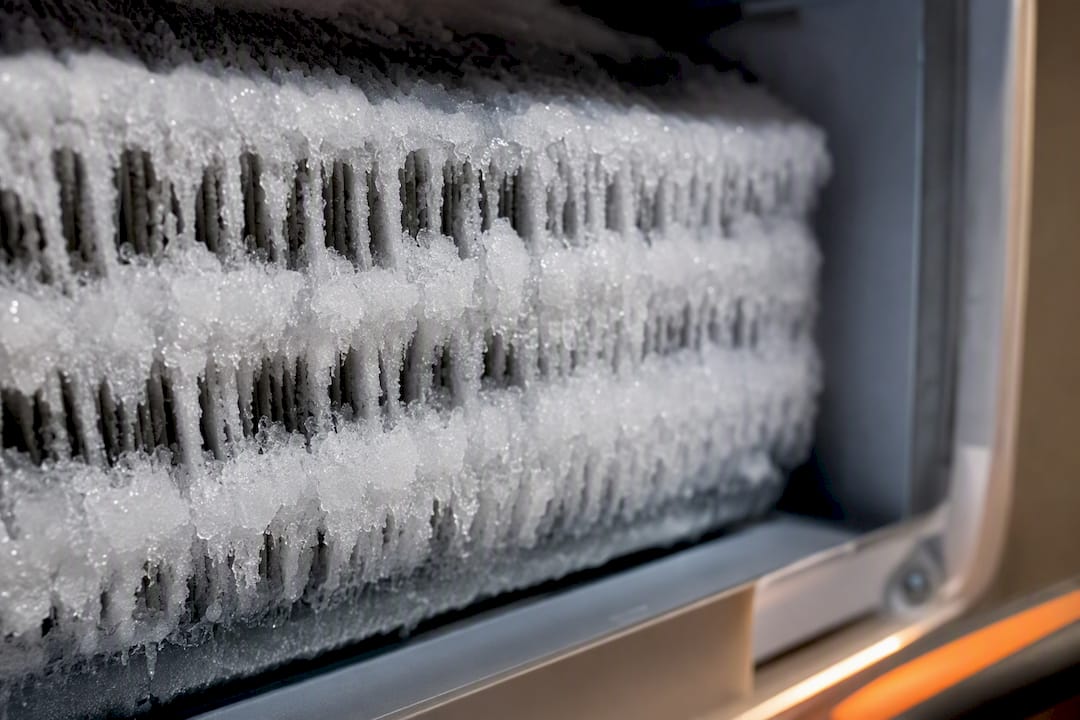
Low refrigerant shows up as longer-than-usual run times, visible ice on the coils, a hissing sound near the line set, or oil stains where refrigerant lines connect. These are signs of a leak that require certified diagnosis, not a homeowner top-off. Refrigerant work is federally regulated, and the EPA requires certified technicians to handle recovery, recharging, and leak repair on these systems.
Reversing valve failures tend to show a clear pattern: the unit cools fine in summer but never produces heat, or it blows cold air even in heat mode. A technician usually tests the solenoid coil’s voltage and resistance first, since a bad solenoid is a cheaper fix than a mechanically stuck valve body. If the valve itself won’t shift, it typically needs replacement.
Electrical and control faults cover a wider range: a tripped breaker that won’t reset, a blown low-voltage fuse on the control board, or a communication error between the indoor and outdoor units. These often throw a specific fault code, and reading that blink pattern correctly can save a technician a diagnostic visit.
Cold outdoor air plays a role too. Standard heat pump mini splits (without hyper-heat or cold-climate technology) lose heating capacity as outdoor temperatures drop into the single digits or low teens Fahrenheit, and the defrost cycle behavior changes in that range. If your no-heat complaint started during a cold snap, ambient temperature may also be part of the story, not just a broken part.
Homeowner-Safe Checks and Simple Fixes
Here’s what you can safely do yourself before calling anyone, and where the line sits.
- Power-cycle properly. Switch off the indoor unit, then flip the breaker off, wait a full 60 seconds, and turn the breaker back on before powering the indoor unit again. Never touch wiring inside the outdoor unit’s electrical panel.
- Clean or replace the filter. Most mini split filters slide out without tools. Rinse a washable filter with lukewarm water, let it dry completely, and reinstall it. Do this every two to four weeks during heavy use, a habit our air filter guide covers in more detail. A Spanish-language step-by-step walkthrough is also available from this filter cleaning guide if a visual reference helps.
- Let ice melt on its own. If you see frost on the outdoor coil, switch to fan-only mode and let the system’s built-in defrost cycle or simple time do the work. Never chip or scrape ice off a coil. You will bend the fins or puncture a line, turning a simple fix into an expensive one.
- Gather information for the technician. Photograph the model and serial number plate, the error code or blink pattern, and the outdoor unit’s coil condition. Note when the problem started and whether it’s constant or comes and goes.
Pro Tip: Take a video of the blink pattern on your indoor unit’s display, not just a photo. Some codes cycle through a sequence, and a technician can often narrow down the fault before they even leave the shop.
Do not attempt to add refrigerant, solder or braze any line, or open the compressor housing yourself. Beyond the legal restrictions, a small mistake here can turn a $300 repair into a full system replacement.
When to Call a Licensed HVAC Technician
Some symptoms mean stop troubleshooting and pick up the phone. Call a licensed technician right away if you notice:
- Hissing sounds, oil stains near the line set, or ice that keeps reforming within hours of clearing it
- A compressor that won’t start or run at all
- Any burning smell from either the indoor or outdoor unit
- A breaker that trips again immediately after reset
- A unit stuck cooling in heat mode, which usually points to a reversing valve problem
A technician’s visit typically includes a pressure gauge check on the refrigerant circuit, electrical tests on the compressor and control board, a solenoid test on the reversing valve, and a fault-code lookup specific to your unit’s brand. Refrigerant work legally requires EPA-certified handling, which is exactly why this step can’t be a DIY project. Parts like a compressor or reversing valve aren’t cheap to replace, since both sit at the core of how the system moves heat.
Speed up the visit by having your photos, the exact circuit or breaker involved, and the dates of any prior service ready when the technician arrives.
What Ernie Sees Over and Over on Mini Split Calls
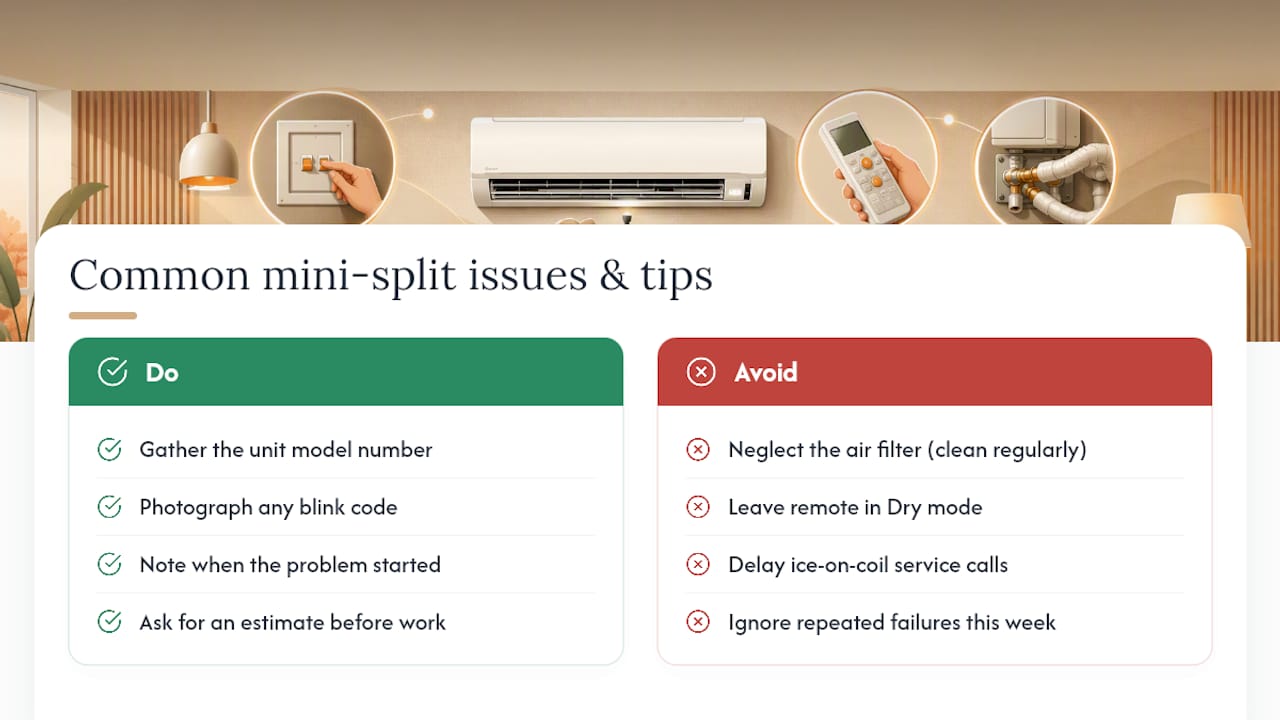
I’ve watched the same handful of failure patterns show up again and again over many years in the HVAC business, and it’s rarely the dramatic stuff people worry about. It’s a filter nobody’s cleaned in eight months, or a remote that got left in dry mode after a hot September. The ice-on-the-coil calls are the ones that actually need us fast, especially when a homeowner tells me it’s the third time this week.
When you call, having your unit’s model number, a photo of any blink code, and a rough timeline of when the problem started saves real time on-site. We give straight, transparent estimates before any work starts, and we offer financing on the bigger repairs, because a failed compressor shouldn’t force a decision you’re not ready to make.
— Ernie M
How Upright Construction & HVAC Gets Your Heat Back On
A professional HVAC service is the difference between guessing at your own repair and getting a real answer the same day you call. Experienced technicians run mini split repair, diagnostics, and 24/7 emergency service, and every visit starts with a full diagnostic checklist, not a guess.

Expect a technician who checks refrigerant pressure, tests electrical components, and walks you through a written quote before any repair begins. No surprise charges, no upsells you didn’t ask for. If your outdoor coil is icing up or your reversing valve is stuck, that’s exactly the kind of mini split repair call we handle every week in Los Angeles, Burbank, and Beverly Hills. When you’re ready for a straight answer instead of another cold night, book a diagnostic through our HVAC repair service page and we’ll get someone out to look at it.
Sources
For background on how these systems work and their limits, see the Department of Energy’s ductless mini-split guidance, ENERGY STAR’s heat pump product guidance, and a detailed fault-code troubleshooting reference.
- Ductless mini-split troubleshooting: fault codes, frozen coils, and communication errors | ServiceMag
- Mini split heat pump not working: troubleshooting and repair guide | Pick Comfort
- Troubleshooting tips for heat pump reversing valves | ACHR News
FAQ
Why Is My Mini Split Blowing Cold Air in Heat Mode?
This usually means the reversing valve is stuck in cooling position, or the system has low refrigerant. Both require a technician to test the solenoid and check pressures.
Why Won’t My Mini Split Go Into Heat Mode?
Check that the remote is actually set to heat and not auto or dry first. If the setting is correct and nothing changes, a control board fault or a stuck reversing valve is likely.
Is There a Reset Button on Mini Splits?
Most units don’t have a dedicated reset button, but you can power-cycle the system by turning it off, cutting power at the breaker for 60 seconds, then restoring power to both indoor and outdoor units.
Why Is My Heat Pump’s Fan Running but No Heat Is Coming Out?
A running fan with no heat points to a compressor that isn’t engaging, a refrigerant problem, or a reversing valve stuck in the wrong position, all of which call for a professional diagnostic rather than a DIY fix.
How Often Should I Schedule Maintenance to Avoid Heating Problems?
Clean or replace filters every two to four weeks during heavy use, and schedule a full professional tune-up once a year before the heating season starts, following the schedule in our HVAC maintenance checklist.