- What does an AC control board actually do?
- What causes an AC control board to fail?
- 8 signs your AC control board is failing
- How technicians diagnose the board — and what you can safely check first
- Repair vs. replace: costs, lifespan, and what pros recommend
- When you need to call a licensed technician immediately
- How to prevent control board failure
- Key Takeaways
- What I’ve learned after 15 years of control board calls
- Upright Construction & HVAC is ready when your system isn’t
- Sources and further reading
- FAQ
- Recommended
TL;DR:
- A failing control board is a common cause when an AC won’t respond to the thermostat, especially if breakers are fine. Most technicians recommend replacing rather than repairing the control board because repairs rarely restore safety or warranty coverage. Proper diagnosis involves checking for symptoms like no thermostat response, diagnostic LED codes, or component partial failures to identify the real issue.
If your AC won’t respond to the thermostat and the breakers look fine, a failing control board is one of the most likely culprits. Before you call anyone, try two things: reset the breaker for your HVAC system and check that your thermostat has fresh batteries. If the system still won’t start or keeps short-cycling, stop there. Do not open the air handler cabinet or probe any wiring while power is on. High-voltage HVAC circuits can deliver a lethal shock, and the National Electrical Code requires licensed technicians for that level of electrical work.
Upright Construction & HVAC sees this exact scenario regularly across Los Angeles. In most cases, professionals recommend replacing a failed board rather than repairing it. Board-level soldering rarely restores full safety protections, and a repaired board typically won’t carry a manufacturer warranty.
Pro Tip: Before assuming the board is bad, confirm the thermostat is calling correctly and the breaker hasn’t tripped. A surprising number of “board failures” turn out to be a dead thermostat battery or a tripped breaker.
What does an AC control board actually do?
The control board is the command center of your HVAC system. It receives a low-voltage (24V) signal from your thermostat and translates that into instructions for every major component in the system.
Here’s what it governs:
- Blower motor — starts and stops the indoor fan based on heating or cooling calls
- Compressor contactor — signals the outdoor unit to begin cooling
- Condenser fan — runs the outdoor fan motor in sync with the compressor
- Ignition sequencing — on gas furnaces, controls the igniter, gas valve, and flame sensor timing
- Safety interlocks — monitors limit switches and pressure sensors; shuts the system down if something is unsafe
- Diagnostic LEDs — blinks error codes visible through the inspection window on the air handler or furnace
Physically, the board sits inside the air handler or furnace cabinet, usually mounted on a metal bracket. You’ll recognize it by its green or tan circuit board, a row of Molex plug connectors, and one or more small LED indicators. Because one board governs so many components, a single fault can look like a blower problem, a compressor problem, or a thermostat problem. That’s what makes AC control board issues tricky to diagnose without the right tools.
What causes an AC control board to fail?
Several factors can cut a board’s life short, and most of them are things homeowners can recognize.
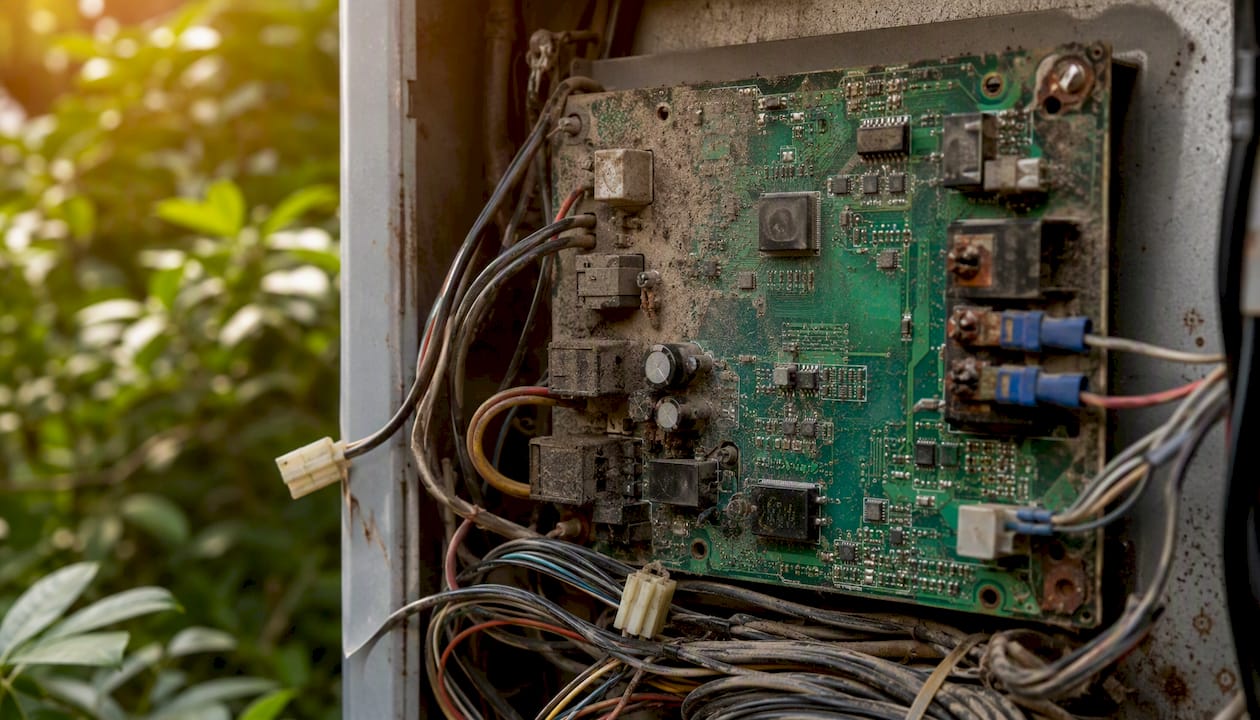
Power surges are the most sudden killer. A lightning strike or a grid fluctuation can fry circuit traces in milliseconds. Power spikes and moisture are two of the most common causes of board damage technicians find in the field. Summer storms in Southern California are a real risk.
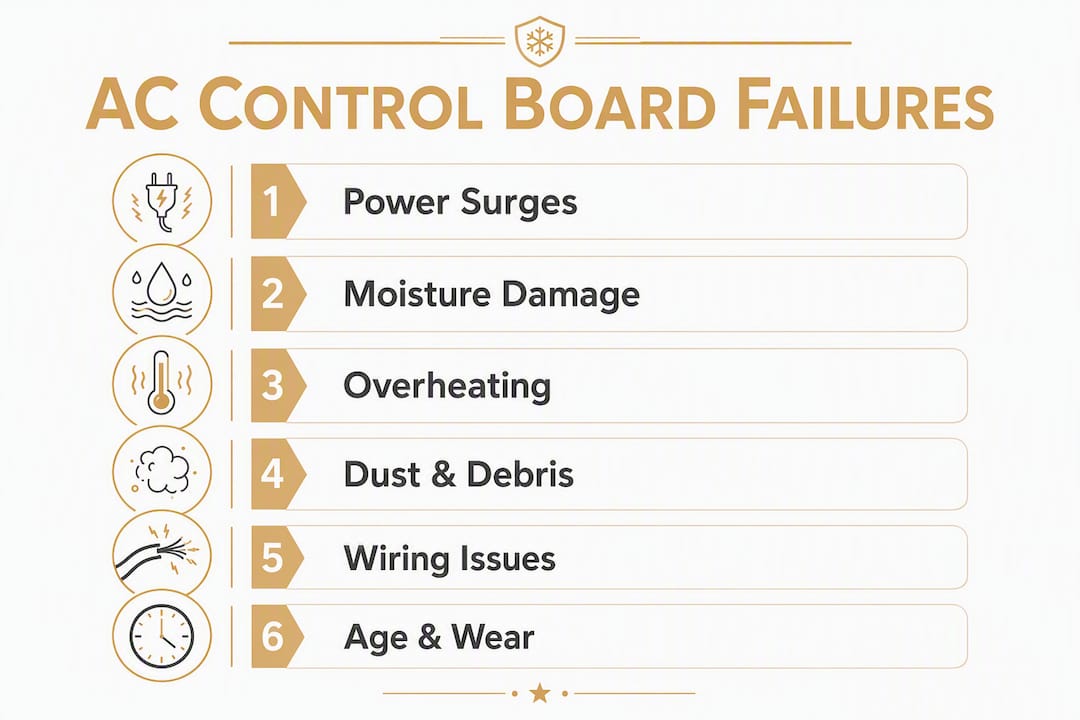
Moisture and corrosion come next. A slow condensate leak near the air handler, or simply high indoor humidity over years, creates conductive shorts on the board’s surface. You might see a greenish residue or rust-colored staining on the connectors.
Overheating happens when airflow is restricted. A clogged filter forces the system to run longer and hotter. The board sits in that heat and degrades faster than it should.
Dust and debris accumulate on the board’s surface and can cause shorts or insulate heat, accelerating component wear.
Loose wiring and vibration gradually work Molex connectors loose over years of operation. A connector that’s 80% seated can cause intermittent faults that look exactly like a dying board.
Age and normal wear eventually take every board. Relays and transistors have finite cycle counts.
Pro Tip: The board often reports a fault triggered by another failed component — a bad capacitor, a failing motor, or a dirty flame sensor. Replacing the board without diagnosing the root cause first usually means the new board fails just as fast.
8 signs your AC control board is failing
These symptoms don’t guarantee a bad board, but they’re the clearest indicators. Work through them in order.
No response to the thermostat (with breakers intact). You set the temperature, nothing happens. The blower doesn’t start, the compressor doesn’t kick on. If the breaker is fine and the thermostat is powered, the board may not be receiving or transmitting the thermostat call.
Diagnostic LED patterns. Look through the inspection window on your furnace or air handler. A steady light usually means normal standby. Rapid blinking, no light at all, or a specific blink sequence (e.g., 3 blinks, pause, 3 blinks) indicates a stored fault code. Your system’s label — usually taped inside the cabinet door — decodes those patterns.
Intermittent operation or short cycling. The system starts, runs for a few minutes, shuts off, and repeats. Short cycling stresses every component and often points to the board failing to hold a relay closed.
One component runs but not the other. The blower runs but the compressor never starts, or vice versa. The board controls each output separately, so a partial failure can knock out just one circuit.
Unusual clicking from the air handler. A relay on the board that’s stuck or failing will click repeatedly as it tries to engage. That sound is distinct from normal startup clicks.
Burning smell or visible scorch marks. This is an emergency. Shut the system off at the breaker immediately. A burning smell from the air handler cabinet, or brown/black marks visible on the board, means something has already burned. Do not restart the system.
Fan runs constantly and won’t shut off. A stuck relay on the board can lock the blower on even when no call is active. Technicians see this pattern often — it’s a classic sign of mechanical relay failure rather than a wiring issue.
Blank or unresponsive control panel. On mini-split or window units, a completely dark display or a panel that won’t respond to any input can indicate the board has lost power or failed entirely. Check the air handler symptoms guide for more on this.
Warning: Burning smell, smoke, or visible scorch marks require an immediate system shutdown and a licensed technician visit. Do not attempt to restart.
How technicians diagnose the board — and what you can safely check first
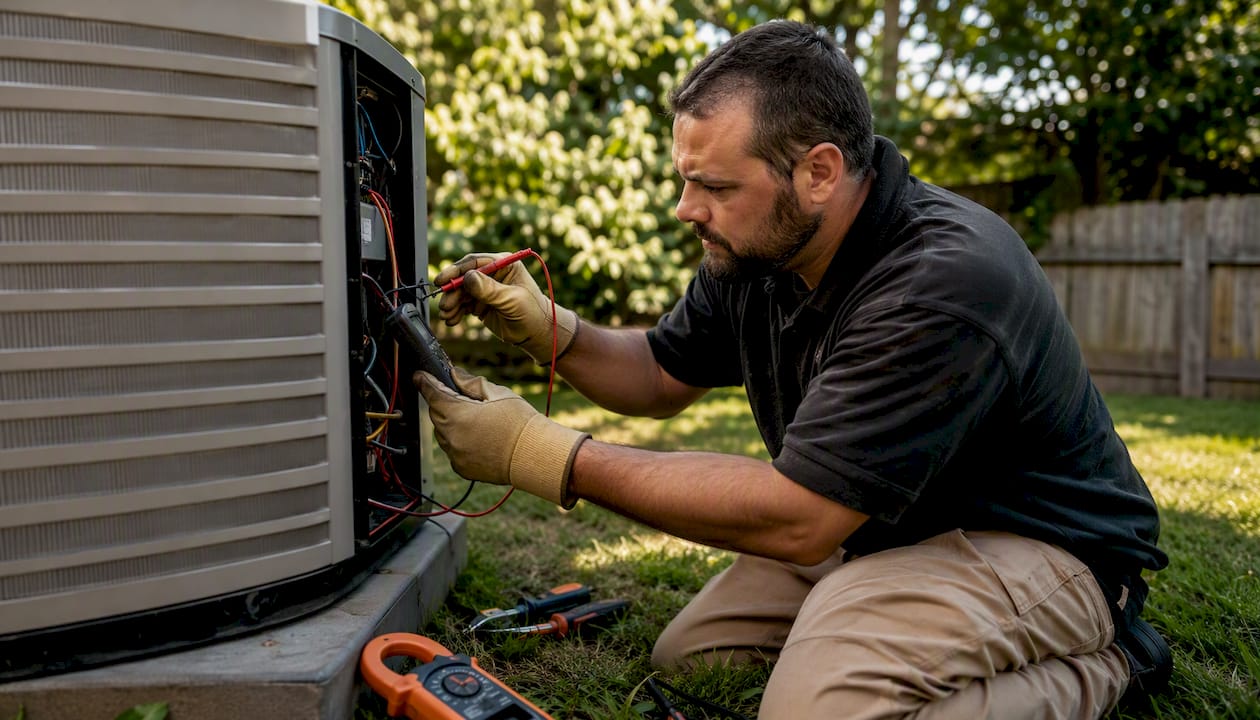
What a licensed technician does
A proper AC emergency diagnosis follows a methodical order. Skipping steps is how technicians end up replacing a good board.
- Visual inspection: burn marks, bulging capacitors, corroded connectors, or melted plastic on the board.
- Read the diagnostic LED blink codes and cross-reference the system’s fault chart.
- Measure incoming voltage at the board — confirm the transformer is delivering 24V. A failed transformer or blown fuse is sometimes the real problem, not the board itself.
- Test internal fuses with a multimeter.
- Check Molex plug seating and measure output voltages to the blower, compressor contactor, and condenser fan.
- Bench-test relays to confirm whether the board or an attached component failed.
Tools used: digital multimeter, clamp ammeter, insulated jumper wires. Homeowners should not use these on live circuits.
Safe checks you can do right now
These require no tools and carry no electrical risk:
- Check the breaker panel — reset any tripped breaker for the air handler and outdoor unit.
- Confirm thermostat settings and replace the batteries.
- Power-cycle the system: turn the thermostat to “off,” flip the breaker off, wait 5 minutes, restore power, then set the thermostat again.
- Look through the inspection window for LED blink codes without opening the cabinet.
- With the system fully off at the breaker, visually inspect accessible wiring for obvious corrosion or soot through the inspection window.
Pro Tip: If any wiring needs to be disconnected, label every conductor and photograph the board before touching anything. Swapping even two wires can permanently destroy a new board the moment power is restored.
Repair vs. replace: costs, lifespan, and what pros recommend
What professionals recommend
Most HVAC technicians recommend replacing a failed control board rather than attempting component-level repair. Soldering individual components rarely restores full safety protections, and a repaired board typically won’t carry a manufacturer warranty. For older systems, it’s also worth comparing repair vs. full replacement before spending money on a board for a system near the end of its life.
Lifespan reality
Manufacturers estimate a board lifespan of 15–20 years under ideal conditions. Real-world factors like dust, moisture, power surges, and poor maintenance typically reduce lifespan to 7–15 years, and early failures in systems as young as 5–10 years are not uncommon.
Typical U.S. cost ranges
| Item | Low | Typical | High |
|---|---|---|---|
| DIY part only | $100 | — | $600 |
| Professional installation (parts + labor) | $550 | — | $1,300 |
| OEM vs. aftermarket board | Lower (aftermarket) | — | Higher (OEM) |
| Manufacturer ideal lifespan | — | several years | — |
| Real-world lifespan | less in high-stress conditions | varies | up to several years (ideal) |
Cost note: Professional installation commonly totals $550–$1,300 depending on unit type, access difficulty, and whether OEM or aftermarket parts are used. OEM boards cost more upfront but tend to offer better compatibility and warranty coverage.
When a board fails because of a surge, replacing it without adding surge protection at the service panel often leads to repeat failure. A good technician checks the whole circuit before installing a new board.
When you need to call a licensed technician immediately
Some situations are not safe to troubleshoot yourself. Call a licensed HVAC technician — not a handyman — if you notice any of the following:
- Burning smell or visible smoke coming from the air handler or furnace
- Scorch marks or melted plastic on or near the board
- Gas odor near a gas furnace (leave the house and call your gas utility first)
- The breaker trips repeatedly when the HVAC system runs
- Multiple components failing at the same time
- Any exposed or visibly damaged wiring inside the cabinet
What to expect when a tech arrives: a full visual and electrical diagnostic, a written quote for OEM board replacement, testing of the transformer and surge protection, and a safety checkout before the system is returned to service. Dangers of live DIY HVAC work include electrical shock, shorts that damage other components, and on gas equipment, carbon monoxide risk. Leave high-voltage and gas-related work to licensed professionals with proper PPE and testing equipment.
For a step-by-step look at what to do during an HVAC emergency, the emergency AC repair checklist covers the sequence clearly.
How to prevent control board failure
Small, consistent habits extend board life significantly, and knowing when to call a professional can help you avoid costly mistakes, as discussed in Avoiding Common Pitfalls: The Challenges of DIY Door Replacement. Here’s what actually makes a difference:
- Change filters regularly — a clogged filter is one of the leading causes of overheating-related board damage. Every 1–3 months depending on your home.
- Keep condensate drain pans clear — a backed-up drain can overflow near the air handler and reach the board.
- Seal the air handler area — keep the space around the furnace or air handler dry and free of standing water.
- Clean the coils annually — dirty evaporator coils restrict airflow and force the system to run longer and hotter.
- Install a whole-home surge protector at the service panel. It’s one of the most cost-effective ways to protect the board from the single most destructive failure mode.
- Schedule an annual professional tune-up — a technician can scan LED blink codes, check capacitor health, and measure transformer voltage before a small problem becomes a board replacement.
Pro Tip: Before the summer cooling season starts, ask your tech to do a blink-code scan and check the transformer output voltage. Catching a weak transformer early costs far less than replacing a board it eventually takes out. The HVAC maintenance checklist is a good reference for what to cover each season.
Understanding why HVAC systems fail early often comes down to skipped maintenance — the board is rarely the first thing to go when a system is well cared for.
Key Takeaways
AC control board failure is most reliably identified by a combination of no thermostat response, diagnostic LED blink codes, and intermittent or partial component operation — and professional replacement is the right call in most cases.
| Point | Details |
|---|---|
| Board lifespan varies widely | Manufacturers estimate 15–20 years under ideal conditions, but real-world average is 7–15 years with environmental stress. |
| Safe homeowner checks first | Reset breakers, replace thermostat batteries, and power-cycle before calling a technician. |
| Replacement beats repair | Board-level soldering rarely restores full safety or warranty; replacement is the professional standard. |
| Typical replacement cost | Professional installation (parts + labor) commonly runs $550–$1,300 depending on unit and access. |
| Upright Construction & HVAC | Provides 24/7 emergency diagnostics, OEM board sourcing, and transparent written quotes in Los Angeles. |
What I’ve learned after 15 years of control board calls
Here’s something I tell every homeowner who calls us convinced their board is dead: the board is the last thing we confirm, not the first. I’ve seen technicians — good ones — replace a board only to have the new one fail within a week because a bad capacitor or a failing motor was the real problem all along. The board was just reporting the fault, not causing it.
The other thing I see constantly is homeowners who’ve already opened the cabinet and started pulling connectors before we arrive. I understand the impulse — you want to do something. But a mislabeled wire or a connector seated 90% of the way can destroy a $400 OEM board the moment power comes back on. The safe checks I listed above are genuinely everything you should do before we get there.
At Upright Construction & HVAC, our diagnostic approach is methodical: we read the codes, test the transformer, check every output voltage, and confirm the triggering component before we ever order a board. That’s how we avoid replacing parts that didn’t need replacing. If you’re in Los Angeles and your system is showing any of the symptoms above, we offer 24/7 emergency diagnostics and can usually get to you the same day.
Upright Construction & HVAC is ready when your system isn’t
When your AC stops responding and you’ve already run through the safe homeowner checks, the next call should be to a licensed technician who can test the full circuit before ordering parts.

Upright Construction & HVAC has been diagnosing and replacing HVAC control boards across the greater Los Angeles area for over 15 years. We carry OEM boards for the most common residential systems, offer transparent written quotes before any work begins, and back our installations with a parts and labor warranty. Our HVAC repair in Los Angeles service is available 24/7 for emergencies, with same-day diagnostic visits in most cases. If you’re weighing whether a board replacement makes sense versus a full system upgrade, our team walks you through the HVAC repair challenges specific to your unit so you can make the call with real numbers in hand. Call us or schedule online today.
Sources and further reading
| Source | What it covers |
|---|---|
| Morris Heat and Air — control board lifespan | Manufacturer vs. real-world lifespan estimates (multiple years ideal; 7–15 years typical) |
| OH Heating — furnace control board replacement guide | Diagnostic steps, cost ranges ($550–$1,300 installed), and surge protection guidance |
| All Pro Service Group — AC control panel cost | Transformer and fuse checks as first diagnostic steps |
| Mansfield TX Plumbing — HVAC circuit board failures | Power surge and moisture as primary failure causes |
| HJ Faust — DIY HVAC repair dangers | Safety risks of live electrical and gas DIY work |
| BC Wide — furnace control board diagnosis | Misdiagnosis risk when triggering component isn’t identified first |
| Upright Construction & HVAC — HVAC repair Los Angeles | Same-day and emergency HVAC repair service in Los Angeles |
| Upright Construction & HVAC — maintenance checklist | Seasonal maintenance steps that extend board life |
This article is general information for homeowners and is not a substitute for professional diagnosis. Always confirm current electrical and safety requirements with a licensed HVAC technician for your specific system and jurisdiction.
FAQ
How do I know if my AC control board is bad?
The clearest signs are no response to the thermostat with breakers intact, a specific LED blink-code pattern on the air handler, or one component running while another won’t start. A licensed technician confirms the diagnosis by measuring transformer output and board voltages with a multimeter.
How much does it cost to replace an AC control board?
Professional replacement (parts and labor) commonly runs $550–$1,300 in the U.S., depending on the unit type, board model, and access difficulty. DIY parts alone typically range from $100 to $600.
Can a control board be repaired instead of replaced?
Component-level board repair is rarely cost-effective and usually doesn’t restore full safety protections or warranty coverage. Most HVAC professionals recommend replacement as the more reliable and safer option.
How long do HVAC control boards last?
Manufacturers rate boards for 15–20 years under ideal conditions, but real-world factors like dust, moisture, and power surges commonly reduce lifespan to 7–15 years. Some boards fail even earlier when environmental stress is high.