
- Where does heat escape most in a typical home?
- Weatherstripping vs. caulk: which one goes where?
- Which weatherstripping material is right for your gap?
- How do you find drafts before you seal anything?
- Step-by-step: how to weatherstrip a door, add a sweep, and seal windows
- What does weatherstripping cost, and how long does it last?
- When should you hire a licensed pro instead of DIY?
- What does the research actually say about savings?
- Key Takeaways
- The fix most homeowners skip (and why it matters most)
- How Upright Construction & HVAC can help you seal your home right
- Useful sources
- FAQ
- Recommended
TL;DR:
- Weatherstripping is an affordable way to reduce heat loss by sealing air leaks around doors and windows. Properly sealing these gaps can cut energy bills by up to 10%, with a quick payback period, especially for exterior doors and operable windows. Professional help is recommended for deeper leaks, such as attic bypasses and duct connections, to ensure comprehensive home energy efficiency.
Weatherstripping is one of the fastest, lowest-cost moves you can make to reduce heat loss in your home. According to the U.S. Department of Energy, air leakage accounts for 25%–40% of the energy used for heating and cooling in a typical U.S. residence. Sealing those leaks, combined with basic insulation, can cut annual energy bills by up to about 10%. That payback often comes in a single heating season.
Here is your three-step starting plan:
- Find the leaks first. Slide a piece of paper under a closed exterior door. If it pulls out easily, you have a gap worth sealing. A lit incense stick near window frames works the same way — watch for smoke that wavers.
- Match the material to the gap. Moving joints (doors, operable windows) need weatherstripping. Stationary cracks in trim or framing need caulk. Using the wrong one means early failure.
- Install it yourself or call a pro. Most door and window jobs are genuine DIY. Structural gaps, attic bypasses, and anything touching your HVAC system are worth a professional look.
Where does heat escape most in a typical home?
Not every gap costs you equally. Attic bypasses, rim joists, and recessed lights are the biggest energy drains in most houses, but they require more involved work. For a weekend DIY project with fast, visible results, exterior doors and operable windows are the right starting point. They are easy to access, the materials cost a modest amount, and you can feel the difference the same day.
Here is a rough priority order for most homes:
- Exterior doors (especially the threshold and the hinge side, which are often overlooked)
- Operable windows (sliding and double-hung sashes lose heat at every seam)
- Attic access hatches (often uninsulated and unsealed)
- Rim joists in the basement or crawl space (large surface area, often bare)
- Recessed lights and wall penetrations for plumbing or ducts
- Gaps around chimneys and vents
Beyond energy savings, sealing air leaks reduces drafts and limits moisture infiltration, which protects framing and drywall over time. In older homes, especially in Los Angeles where building stock from the 1950s and 1960s is common, those moisture pathways can quietly cause rot and mold long before you notice a comfort problem.
Weatherstripping vs. caulk: which one goes where?
The rule is simple: weatherstripping for anything that moves, caulk for anything that stays still. The DOE confirms this distinction — using caulk on a moving door joint will crack it within weeks, and foam tape on a stationary trim gap will compress and lose its seal just as fast.
Common failure modes to know:
- Adhesive-backed foam strips peel off dirty or oily frames within one season.
- Foam tape degrades quickly on south- or west-facing doors with heavy UV exposure.
- Caulk applied across a moving joint cracks at the first door cycle.
- V-strip applied without cleaning the channel fills with dust and loses grip.
Quick selection rules:
- Gap moves when you open/close? Use weatherstripping.
- Gap is in trim, framing, or a fixed joint? Use caulk or backer rod plus caulk for wider gaps.
- Exterior exposure with UV and moisture? Choose silicone caulk or reinforced rubber/vinyl strip, not felt or basic foam.
- Gap wider than ½ inch? Fill with backer rod first, then finish with caulk.
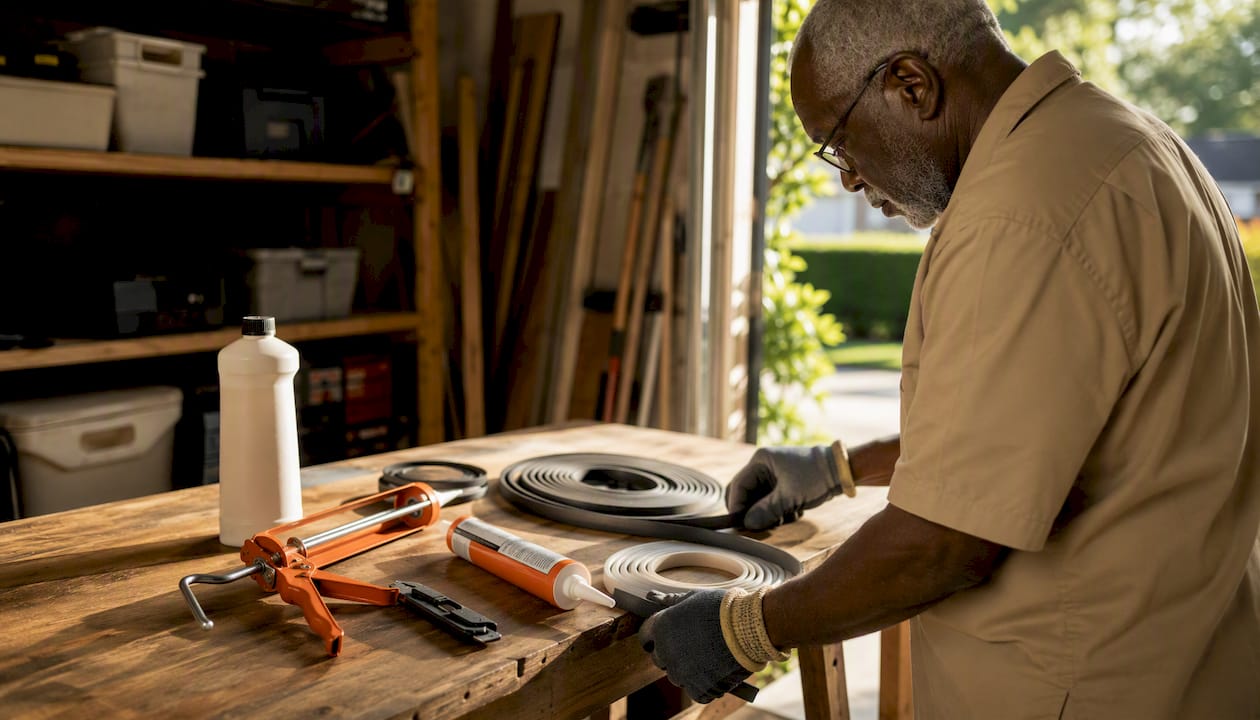
Pro Tip: Before applying any adhesive-backed strip, wipe the frame with rubbing alcohol and let it dry completely. Dust and skin oils are the number-one reason strips fail in the first month. On high-traffic exterior doors, add a few small mechanical fasteners (staples or short screws) at the corners to keep the strip anchored through temperature swings.
Which weatherstripping material is right for your gap?
There is no single best material. The right choice depends on gap size, how much the joint moves, exposure to weather, and how long you want it to last.
| Material | Best for | Durability | DIY ease | Typical cost |
|---|---|---|---|---|
| V-strip (spring metal or plastic) | Narrow gaps on door sides and window channels | 5–10 years | Moderate (cutting and tacking required) | $15–$40 per door |
| Foam tape (open-cell or closed-cell) | Small, irregular gaps; low-traffic windows | 1–3 years | Very easy (peel and stick) | under $15 per window |
| Adhesive-backed rubber or vinyl | Door stops and window sashes; medium gaps | 3–5 years | Easy | $15–$40 per door |
| Door sweep (fin or brush style) | Bottom-of-door gap; threshold seal | 3–7 years | Easy to moderate | $10–$30 per door |
| Tubular rubber or silicone | Exterior doors; large or irregular gaps | 5–10 years | Moderate (staple or tack to stop) | $15–$40 per door |
| Felt | Interior doors; low-traffic, dry locations only | 1–2 years | Very easy | under $15 per window |
| Spring metal threshold | High-traffic exterior door bottoms | 7–15 years | Moderate (screw-mounted) | $15–$40 |
For exterior doors in Southern California, tubular silicone or reinforced rubber is the practical choice. The climate is mild, but UV exposure is intense, and foam tape degrades noticeably within a year on a west-facing door. For winterizing your doors more thoroughly, door sweeps and tubular seals work together rather than as alternatives.
How do you find drafts before you seal anything?
Sealing the wrong spot wastes time and money. Run these tests first, in order.

| Test | What you need | What to look for |
|---|---|---|
| Paper test | A sheet of printer paper | Close the door on the paper. If it slides out without resistance, the seal is gone. |
| Smoke/incense test | A lit incense stick or candle | Hold near window frames, door edges, and trim. Smoke that wavers or bends toward the wall marks a leak. |
| Visual inspection | A flashlight, daylight | Stand inside on a bright day. Visible light around a closed door or window frame means a gap. |
| Thermal camera | Rental unit or pro service | Shows cold spots on walls and frames in real time; most useful in winter. |
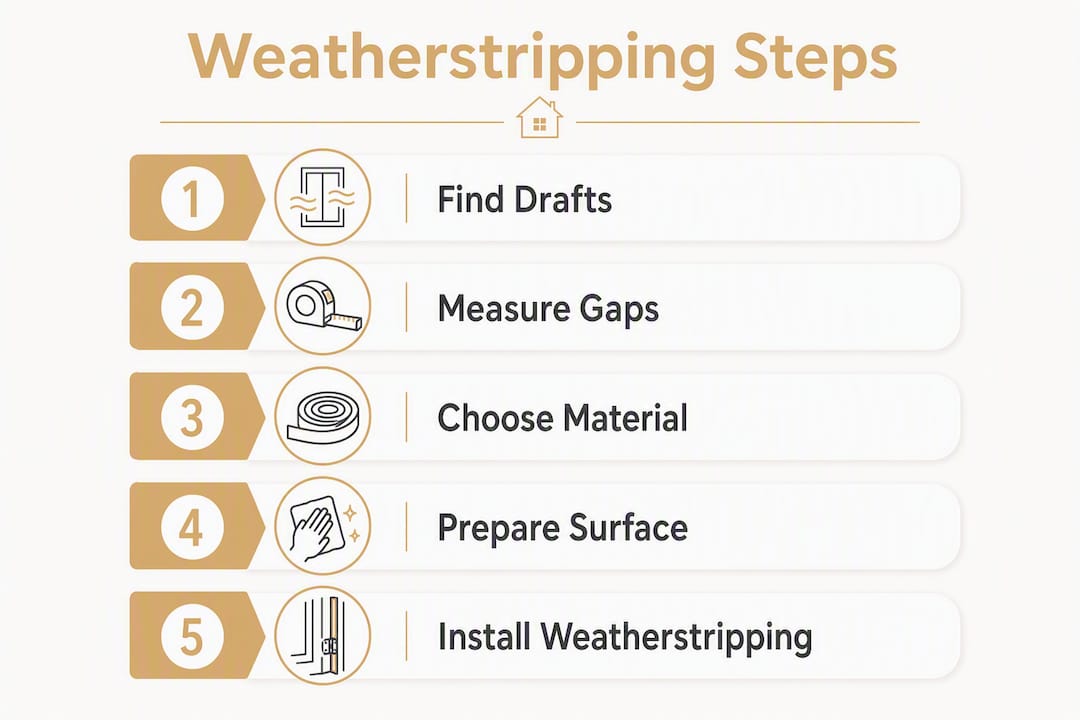
ENERGY STAR recommends the paper test and smoke test as the practical starting point for most homeowners. A blower-door test, which a licensed contractor performs, gives precise leakage measurements and finds hidden bypasses the smoke test misses.
Measuring gaps correctly: Use a tape measure to record the clear opening width and depth. For door sweeps, measure the gap between the door bottom and the threshold with the door closed. Note whether the gap is consistent across the full width or tapers at one end, which can signal a warped frame.
Safety notes: When checking attic access hatches, watch your step on ceiling joists. Near electrical panels or recessed lights, do not probe with metal tools. If you smell gas near any penetration, stop and call your utility company.
Step-by-step: how to weatherstrip a door, add a sweep, and seal windows
Tools and materials
Tape measure, utility knife or scissors, rubbing alcohol and clean rags, a pencil, a hammer or staple gun (for V-strip), a screwdriver (for door sweeps), and your chosen weatherstripping material.
A. Replacing door weatherstripping
- Open the door and peel or pry off the old strip from the door stop. Remove any adhesive residue with rubbing alcohol.
- Measure the full height of each side jamb and the top of the door frame. Add 1–2 inches to each measurement before cutting.
- Clean the door stop surface with alcohol. Let it dry for five minutes.
- Press the new strip firmly into place, starting at the top corner and working down. For adhesive-backed types, press for 30 seconds per foot.
- Close the door slowly. You should feel light resistance. If the door drags heavily, the strip is too thick for that gap.
- Break-in period: New seals often feel stiff for the first few days. Give it a week before deciding the fit is wrong. Rubber and vinyl compress to the frame over time.
B. Installing a door sweep
- Close the door and mark the floor line on the inside face of the door with a pencil.
- Hold the sweep against the door bottom so the fin or brush just touches the threshold. Mark the screw holes.
- Pre-drill if the door is solid wood. Drive screws snugly but do not overtighten — a distorted sweep loses its seal.
- Test by sliding paper under the closed door. No movement means a solid seal.
C. Sealing operable windows
- Clean the window channel or sash stop with alcohol.
- For narrow gaps, press adhesive-backed V-strip into the channel with the open side of the “V” facing the gap. Cut slightly long and compress the end into the corner.
- For wider sash gaps, use foam tape on the bottom rail of the upper sash where it meets the lower sash.
- For gaps behind trim, ENERGY STAR recommends filling with backer rod first, then finishing with a paintable caulk.
Pro Tip: Never stretch weatherstripping to make it fit a longer run. Rubber and vinyl have material memory and will contract back, leaving corner gaps within weeks. Cut slightly long and compress the material into place at the corners instead.
Common mistakes: Skipping the alcohol wipe, stretching strips to fit, and overtightening door-sweep screws that bow the door bottom. Each one shortens the seal’s life by months.
What does weatherstripping cost, and how long does it last?
DIY weatherstripping materials typically run $15–$40 per door, depending on the material and door size. A full window seal with V-strip and foam tape usually costs under $15 per window. Professional installation adds labor, but the material costs stay in the same range.
| Material | Typical lifespan | Signs it needs replacing |
|---|---|---|
| Felt | 1–2 years | Matted, compressed, visible gaps |
| Open-cell foam tape | 1–3 years | Crumbling, no longer springs back |
| Adhesive rubber/vinyl | 3–5 years | Peeling edges, adhesive failure |
| V-strip (plastic) | 3–6 years | Bent flat, no longer springs open |
| Tubular rubber/silicone | 5–10 years | Cracking, hardening, visible splits |
| Spring metal V-strip | 5–10 years | Bent permanently flat |
| Spring metal threshold | 7–15 years | Worn fin, visible light under door |
On energy savings: small-project studies put the reduction at roughly 5%–10% for well-sealed doors and windows. Combined with basic insulation work, aggregate retrofit analyses show 10%–20% savings on heating and cooling across the whole house. On a $200/month heating bill, even the low end of that range pays back a $30 door kit in a single month.
When should you hire a licensed pro instead of DIY?
Most door and window sealing is genuinely DIY-friendly. But some situations call for a licensed contractor.
Call a pro when you see any of these:
- Visible daylight or gaps larger than ¾ inch at door or window frames (structural movement likely)
- Repeated moisture stains or mold near frames after sealing
- Drafts that persist after you have sealed every visible gap (hidden attic bypasses or duct leaks)
- You need a blower-door test to measure actual leakage before and after
- Duct sealing or rim-joist insulation is part of the scope
- Work requires a permit (common for structural repairs or HVAC modifications)
What a licensed contractor does differently: A pro brings a blower-door to measure actual air changes per hour, a thermal camera to find hidden bypasses, and the tools to seal rim joists, attic hatches, and duct connections in a single visit. They can also coordinate weatherstripping with HVAC duct sealing so the two systems work together rather than against each other.
What to ask before you hire:
- Do you perform a blower-door test before and after?
- Which materials do you use for exterior versus interior gaps?
- Does this scope require a permit?
- What is the estimated leakage reduction I should expect?
If your furnace is cycling more than usual after you seal the house, that is a separate diagnostic question. Common HVAC repair challenges can look like air-leak symptoms but have nothing to do with the envelope.
What does the research actually say about savings?
The numbers from DOE, ENERGY STAR, and Lawrence Berkeley National Laboratory (LBNL) are consistent and worth knowing before you budget a project.
“Air leakage accounts for between 25 percent and 40 percent of the energy used for heating and cooling in a typical residence. Sealing air leaks and adding insulation can provide up to about 10% savings on annual energy bills in many homes.” — ENERGY STAR Air Sealing Fact Sheet / Seal and Insulate with ENERGY STAR
LBNL’s retrofit analysis of U.S. homes found that professional weatherization programs typically achieve significant reductions in normalized air leakage, measured by paired blower-door tests before and after. Whole-envelope tightening combined with insulation upgrades can lead to measurable annual heating and cooling savings.
Two honest caveats. First, savings vary by how leaky your home was to begin with, your climate zone, and whether attic and wall insulation is also addressed. A house that is already fairly tight will see smaller percentage gains. Second, in a very airtight home, sealing can reduce fresh-air exchange enough to affect indoor air quality. If you are doing extensive sealing beyond doors and windows, ask a pro whether mechanical ventilation is worth adding. ENERGY STAR frames air-sealing as a high-opportunity starting point that complements, but does not replace, insulation upgrades.
Key Takeaways
Properly weatherstripping doors and windows, combined with caulking stationary gaps, is one of the highest-return DIY measures a homeowner can take to cut heat loss and reduce energy bills.
| Point | Details |
|---|---|
| Air leakage is costly | The DOE links 25%–40% of heating/cooling energy to air leaks in a typical home. |
| Start with doors and windows | They offer the fastest, lowest-cost payback and are accessible to most DIYers. |
| Match material to the gap | Use weatherstripping on moving joints and caulk on stationary cracks; wrong product means early failure. |
| DIY costs are low | Materials typically run $15–$40 per door, with savings on sealed openings can be noticeable. |
| Upright Construction & HVAC | For complex leaks, blower-door testing, or duct sealing in Los Angeles, Upright Construction & HVAC offers professional diagnostics and full-scope sealing services. |
The fix most homeowners skip (and why it matters most)
Here is what I see over and over in Los Angeles homes: a homeowner buys foam tape, slaps it on the door stop, and calls it done. The tape lasts eight months, peels off in summer heat, and the draft comes right back. They assume weatherstripping does not work. It does work. The problem is almost always surface prep and material choice, not the concept.
The other thing people underestimate is the door sweep. Most exterior doors in older LA homes have a gap at the bottom you could slide a pencil under. That single gap, running the full width of the door, loses more conditioned air than all three sides of the door frame combined. A $15 brush sweep fixes it in 20 minutes.
In Southern California, the priority order shifts slightly compared to colder climates. Moisture control matters more than you might expect, because our marine layer and occasional heavy rains push humidity into frames that were never designed to handle it. Attic access hatches are also chronically neglected here, partly because attics are used for storage and the hatch gets buried. That one unsealed hatch can undermine everything else you seal on the ground floor.
My honest recommendation: run the paper test on every exterior door this weekend. If the paper slides, fix it before you spend a dollar on anything else. It is the highest-return 20 minutes in home energy efficiency.
How Upright Construction & HVAC can help you seal your home right

Sometimes the drafts you feel are not coming from where you think. At Upright Construction & HVAC, we have spent 15 years diagnosing Los Angeles homes where the real leaks were hiding in attic bypasses, rim joists, and duct connections, not the door frames the homeowner had already sealed three times.
Our process starts with a thermal scan and, where the scope warrants it, a blower-door test that gives you a before-and-after leakage number. From there, we handle full-perimeter sealing, rim-joist insulation, duct sealing, and any HVAC adjustments needed after the envelope tightens. Financing is available for larger projects, and our team is reachable 24/7 for urgent situations.
If you want a professional set of eyes on your home’s air leakage, schedule a diagnostic visit with Upright Construction & HVAC and get a clear scope and estimate before any work begins.
Useful sources
- ENERGY STAR Air Sealing Fact Sheet (PDF)
- Seal and Insulate with ENERGY STAR
- Sealing behind window and door trim | ENERGY STAR
- Weatherstripping | U.S. Department of Energy
- Air Leakage of U.S. Homes: Retrofit Analysis | LBNL/OSTI
- Building America Solution Center: Weatherstripping
- Reducing Heat Loss in Your Home | Purdue University INPREP
For a personalized checklist and professional estimate, contact Upright Construction & HVAC.
FAQ
Does weatherstripping actually keep heat in?
Yes. Weatherstripping seals the moving joints around doors and operable windows where conditioned air escapes, directly reducing heat loss. The DOE ties 25%–40% of a home’s heating and cooling energy to air leakage, and sealing air leaks and adding insulation can provide up to about 10% savings on annual energy bills in many homes.
How do you minimize heat loss in a house?
Start by sealing exterior doors and operable windows with weatherstripping and door sweeps, then caulk stationary gaps in trim and framing. For deeper savings, add attic insulation and seal rim joists. ENERGY STAR estimates that sealing air leaks and adding insulation can provide up to about 10% savings on annual energy bills in many homes.
What is the best material to reduce heat loss at doors?
Tubular rubber or silicone weatherstripping on the door stop, paired with a brush or fin door sweep at the threshold, gives the longest-lasting seal for most exterior doors. Spring metal V-strip is the most durable option for the hinge and latch sides where the gap is narrow and consistent.
Is it worth having a professional seal your home?
For basic door and window sealing, DIY is cost-effective at $15–$40 per door. A licensed contractor adds real value when you need a blower-door test, have persistent drafts after DIY sealing, or need attic, rim-joist, or duct work done at the same time. Upright Construction & HVAC offers full diagnostic and sealing services in the Los Angeles area.
Can sealing your home too tightly cause problems?
In very airtight homes, aggressive sealing can reduce fresh-air exchange enough to affect indoor air quality. This is rarely a concern from door and window weatherstripping alone, but if you are sealing attic bypasses, rim joists, and ducts in the same project, ask a licensed contractor whether mechanical ventilation is needed.
Recommended
- Essential Heat Balance Tips For Every Floor In Winter – Upright Construction & HVAC
- Boost AC Efficiency How Capacitors Transform Performance – Upright Construction & HVAC
- Common Reasons Your Heat Isn’t Working – Upright Construction & HVAC
- Wondering Why Your Heater Blowing Cold Air Instead Of Hot Air? Here’s Why – Upright Construction & HVAC