
- Quick troubleshooting checklist you can run in 15 minutes
- Power and wiring: how to spot Nest power problems and safe homeowner checks
- HVAC-side maintenance and faults that make the system run but not cool
- Simple tests to isolate whether the Nest or the AC is the problem
- When to call a professional and what to tell them
- Ernie M’s field notes: common misdiagnoses and the quick diagnostic checklist we use
- How Upright Construction & HVAC can help
- FAQ
- Sources
If your Nest is running but your house still feels warm, the three likeliest culprits are a power or wiring fault, restricted airflow from a dirty filter or blocked condenser, or a mechanical refrigerant or compressor problem. Start by confirming the thermostat is set to Cool, swapping in a clean air filter, and checking that the outdoor unit actually kicks on. If none of that helps within 15 minutes, it’s time to dig deeper or call a pro.
TL;DR:
- Most cooling issues are caused by simple factors such as thermostat missettings, dirty filters, or blocked outdoor units, not system failure.
- Power and wiring faults often show as Wi-Fi drops, low battery warnings, or error codes like E1, N260, or N261, which can be checked safely by reseating wires after turning off power.
- Mechanical faults such as refrigerant leaks, compressor failure, or restricted airflow require professional diagnosis involving refrigerant and coil inspections.
- Measuring the temperature difference between return and supply vents helps identify airflow or refrigerant problems that cause ineffective cooling.
- Homeowners should always document error codes, steps taken, and temperature readings before calling a technician to streamline repairs and avoid unnecessary visits.
Quick troubleshooting checklist you can run in 15 minutes
Most Nest cooling complaints trace back to something simple. Before you assume the thermostat is broken, work through this order:
- Confirm the thermostat is set to Cool, not Heat or Off, and that the target temperature is actually below the room temperature.
- Look for a blue cooling ring or snowflake icon on the display, which confirms the Nest is actively calling for cooling.
- Restart the thermostat from the Settings menu, then wait a few minutes to see if the system responds.
- Safely power cycle the outdoor unit at the breaker, waiting at least 30 seconds before switching it back on.
- Pull the air filter and hold it up to a light. If you can’t see light through it, replace it and open any closed supply registers around the house.
- Walk outside and check whether the condenser fan is spinning and whether leaves, grass clippings, or mulch are blocking the unit.
- Open the Nest app and check for a “Delayed” or “Starts in” message, which usually means the system is protecting the compressor rather than failing.
Pro Tip: If the Nest app shows a countdown before cooling starts, that’s a built-in compressor protection delay, not a malfunction. Give it the full wait time before troubleshooting further.
Power and wiring: how to spot Nest power problems and safe homeowner checks
A Nest that keeps dropping Wi-Fi, shows a low battery warning, or displays a “Delayed” message more often than it should is usually telling you it’s not getting steady power. Specific error codes point to the same issue:
- E1 or similar power errors often mean the thermostat isn’t receiving consistent voltage from the HVAC system.
- N260 or N261 codes typically relate to wiring or connection problems at the base plate.
- Frequent restarts or a blank screen can mean the battery inside the Nest is draining faster than it can recharge.
To check this safely, turn off power to the system at the breaker first. Then gently pull the Nest display off its base, and look at the wire terminals. Confirm each wire is fully inserted, the copper strands aren’t frayed or touching each other, and nothing has backed out of its terminal. Reseat the display, then restore power and watch for the Nest to boot normally.
If your system has a spare wire, your thermostat can be connected to a C wire for continuous power. When no spare wire exists, Nest support recommends installing a Nest Power Connector, an official accessory that provides steady power without running new wire through your walls. Third-party adapters can cause intermittent faults, so stick with the Power Connector or a proper C-wire install. If reseating the wires and trying the Power Connector doesn’t resolve the errors, the problem has likely shifted from wiring to the HVAC system itself, and it’s time to move to maintenance checks.
HVAC-side maintenance and faults that make the system run but not cool
A thermostat that’s calling correctly but still not cooling is often a sign the HVAC equipment itself can’t move or reject heat the way it should. ENERGY STAR’s maintenance guidance recommends checking air filters monthly and replacing them at least every three months, since a clogged filter chokes airflow and makes the whole system work harder for less cooling.
Beyond the filter, a few homeowner-level checks can rule out the most common mechanical culprits:
- Outdoor condenser and coil: clear leaves, dirt, and plant growth from around the unit, and keep at least two feet of clearance so it can exchange heat properly.
- Condenser fan: confirm it’s spinning when the system calls for cooling. A fan that hums but doesn’t turn usually means a failed capacitor.
- Condensate drain: check for standing water near the indoor unit, which can signal a clog that trips a safety switch and shuts cooling down.
- Evaporator coil: look for frost or ice buildup, a sign of restricted airflow or low refrigerant that needs professional attention.
Seasonal pre-checks like these catch small problems before they turn into no-cooling calls. ENERGY STAR’s own data points to maintenance gaps, not the thermostat, as the more common root cause. If you’ve cleared the filter, cleaned the condenser, and confirmed the fan runs but the house still isn’t cooling, you’re likely looking at something mechanical: low refrigerant charge, a failed compressor or capacitor, or ductwork that’s too restricted to move enough air. These require a licensed technician with gauges and airflow meters, not a homeowner fix.
Simple tests to isolate whether the Nest or the AC is the problem
Before you call anyone, a few measurements can tell you whether the thermostat or the equipment is at fault.
- Set the target temperature several degrees below the current room temperature and watch whether the outdoor unit and indoor fan both start within a minute or two, and note what Time-to-Temp estimates in the app.
- If you kept your old thermostat, reinstall it temporarily. If the old thermostat gets the AC running normally, the Nest or its wiring is the problem. If the AC still won’t cool with the old thermostat, the fault is in the HVAC system.
- Hold a basic thermometer at a return air grille, then at a nearby supply vent, and compare the two readings. Diagnostic guidance from the Department of Energy treats this temperature split as a core measurement for spotting airflow or refrigerant problems that a thermostat swap can’t fix.
- Write down any error codes, the exact time cooling started and stopped, and anything unusual in the Nest app’s energy history. This record turns a vague complaint into a clear handoff.
Running these tests in order means you walk into a service call with answers instead of guesses, which tends to shorten the visit and the bill.
When to call a professional and what to tell them
Some symptoms mean it’s time to stop troubleshooting and pick up the phone: no cooling at all after the checks above, visible frost or ice on the indoor coil, an oily residue near refrigerant lines, a breaker that keeps tripping, or “Delayed” messages that persist after you’ve fixed the power connection.
When you call, have this ready:
- Your thermostat model and any error codes shown.
- What happened when you swapped in your old thermostat, if you tried it.
- The temperature split you measured between return and supply air.
- Every step you’ve already tried, in order.
Repair costs generally scale with the problem: a filter change or coil cleaning costs far less than refrigerant work, and a compressor replacement sits at the top of that range. Get a written estimate before any repair begins.
Pro Tip: Never attempt refrigerant repairs or open electrical components beyond reseating thermostat wires. Both require licensed equipment and training.
Ernie M’s field notes: common misdiagnoses and the quick diagnostic checklist we use
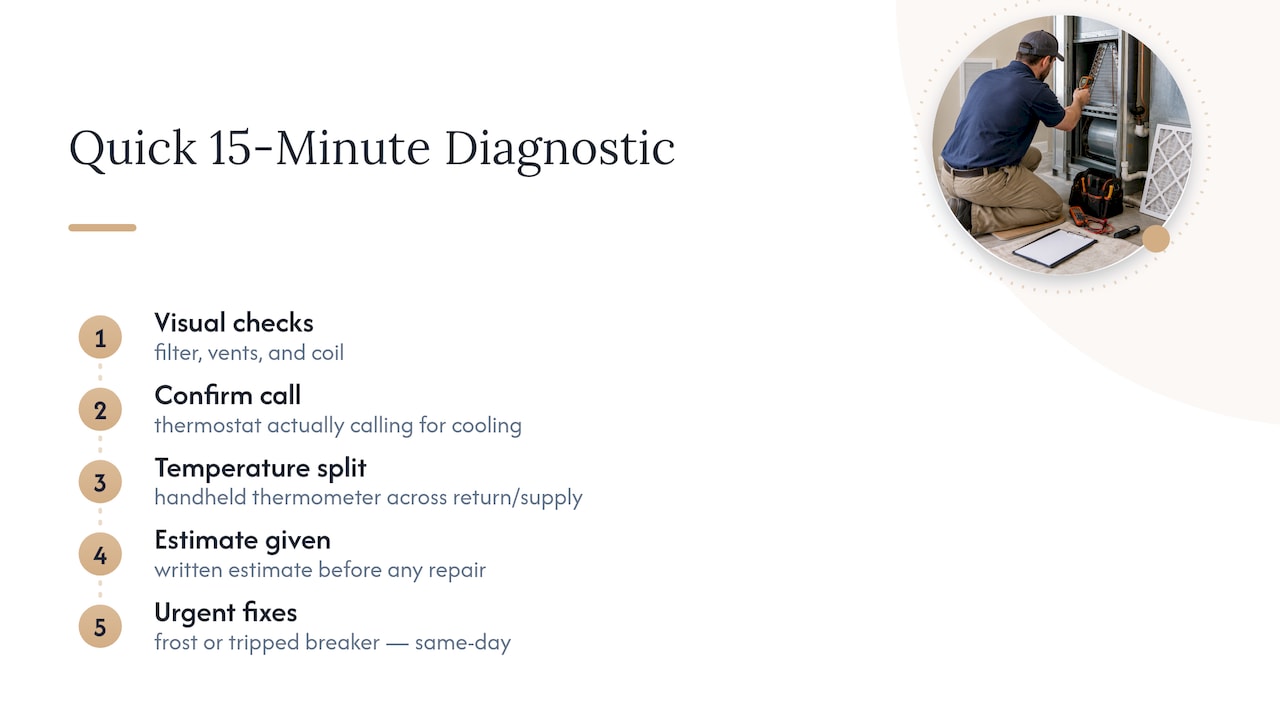
I’ve lost count of how many service calls start with “my Nest is broken” and end with a dirty filter or a closed vent in a back bedroom. Homeowners often assume wiring the moment a screen looks off, when the fix is usually simpler.
Our techs run the same sequence every time: visual check of the filter, vents, and coil, confirm the thermostat is actually calling for cooling, then a quick temperature split with a handheld thermometer before touching anything mechanical. We give you a written estimate before any repair, and we treat frost on a coil or a tripping breaker as same-day, not next-week, situations.
— Ernie M
How Upright Construction & HVAC can help
When the checks above point to something beyond a filter swap, you want someone who can measure the problem instead of guessing at it. Upright Construction & HVAC handles exactly this kind of call across the Los Angeles area, from power and wiring fixes to full refrigerant diagnostics.

Our visits typically include:
- Thermostat and wiring checks, including Nest Power Connector installation when a C wire isn’t available.
- Condenser and coil cleaning to restore airflow the thermostat can’t fix on its own.
- Refrigerant-level diagnostics and compressor or capacitor repair when the fault is mechanical.
- Maintenance plans that catch filter, coil, and drain issues before they turn into a no-cooling call.
Our techs show up ready to measure, not guess, and walk you through a transparent estimate before any work starts. Before you call, jot down your thermostat model, any error codes, and what you’ve already tried. Reach out through our HVAC repair page to schedule a diagnostic visit, or ask about financing if the fix turns out to be a bigger repair.
FAQ
Why is Nest saying 2+ hours to cool?
A long Time-to-Temp estimate usually means the Nest is still learning your home’s cooling speed, a process that affects the first several days of use. It can also appear when the outdoor temperature is far above your target, since larger gaps simply take longer to close regardless of equipment condition.
Why do HVAC guys hate Nest thermostats?
Some technicians find smart thermostats add a wiring step, since many older systems lack the spare wire a Nest needs for steady power, which can mean an extra visit or a Power Connector install. The friction is usually about the installation step, not the thermostat’s ability to run a cooling system correctly.
What’s the life expectancy of a Nest thermostat?
Google doesn’t publish an official lifespan figure for the Nest thermostat, so it’s not publicly listed. In practice, most smart thermostats last as long as their wiring and power stay stable, with failures more often tied to power issues than age.
Why would my AC be running but not cooling?
The system is likely moving air without rejecting heat properly, which points to a dirty filter, a blocked outdoor condenser, or a mechanical issue like low refrigerant or a failing compressor. A temperature split reading between your return and supply air, as described in Department of Energy diagnostic guidance, helps separate an airflow problem from a true mechanical fault.
Sources
For step-by-step official procedures, see Google’s Nest cooling troubleshooting guide and the Nest Power Connector page. ENERGY STAR’s maintenance checklist covers filter and seasonal upkeep, and poor attic airflow, explained in this roofing ventilation overview, can compound cooling struggles no thermostat setting will fix.