
- Key Takeaways
- Tools and Materials for Cleaning Air Vents at Home
- What Should You Do Before You Start Cleaning?
- Steps to Clean AC Vents in Your Home
- How Do You Clean Vents You Can’t Reach?
- How Often Should You Clean AC Vents?
- When Do You Need Professional Duct Cleaning?
- Ernie’s Field Notes on Filters, Inspections, and Prevention
- What I’d Want My Own Family to Know
- Get a Professional Inspection When DIY Isn’t Enough
- Sources
- FAQ
- Recommended
Most vent covers and the section of ductwork right behind them can be cleaned safely by any homeowner with a screwdriver, a vacuum, and about 20 minutes per room. You don’t need special equipment or a technician for this part of the job. Here’s what to do before you touch a single vent:
- Turn off your HVAC system at the thermostat, and if you’re comfortable doing so, flip the breaker for the air handler too.
- Gather your tools: a screwdriver, vacuum with crevice and brush attachments, microfiber cloths, and mild dish soap.
- Lay down a drop cloth or old towel under the vent you’re working on to catch dust and water drips.
- Remove the vent cover if it’s accessible without a ladder or awkward reach.
If you spot mold, water stains, pest droppings, or dust that keeps blowing out of the registers no matter how much you clean, stop. That’s not a vent-cleaning problem anymore. That’s a job for a professional inspection.
I’ve been in and out of Los Angeles homes for over 15 years with Upright Construction & HVAC, and I can tell you the vent cleaning part of home air quality is the one homeowners get right most often. It’s the “is something deeper going on” part that trips people up. We’ll cover both.
Key Takeaways
Cleaning air conditioning vents at home works well for dust and grime on covers and register openings, but persistent contamination, mold, or airflow problems require a professional duct inspection.
| Point | Details |
|---|---|
| Power off first | Shut down the HVAC system and breaker before removing any vent cover to stop dust from recirculating. |
| Clean covers and openings | Soak covers 10 to 15 minutes in soapy water and vacuum the visible duct opening with a crevice tool. |
| Check the filter | Replace or inspect your filter right after cleaning vents, since a dirty filter undoes the work. |
| Watch for professional triggers | Mold, water damage, vermin, or dust that keeps returning mean it’s time to call a contractor. |
| Schedule routine checks | Dust vents every 6 months and consider a full inspection with Upright Construction & HVAC annually. |
Tools and Materials for Cleaning Air Vents at Home
Before you start pulling covers off the wall, get everything laid out. Stopping halfway through to hunt for a screwdriver just means more dust settles back where you cleaned it.
Essential tools:
- Phillips or flathead screwdriver (check your vent screws first)
- Vacuum with crevice tool and soft brush attachment
- Microfiber cloths (at least two or three)
- Soft-bristle brush (an old toothbrush works for corners)
- Bucket with warm water and a few drops of mild dish soap
Protective gear and surface prep:
- Dust mask, or an N95 if the vent looks especially dusty
- Work gloves
- Drop cloth or an old sheet to catch debris and water
Nice-to-haves if you’re doing a full-house cleaning:
- Extendable duster with a microfiber head for ceiling vents
- A can of compressed air for blowing dust toward the vacuum nozzle
- A sturdy ladder for anything above shoulder height
Pro Tip: Skip the bleach, ammonia, or harsh degreasers. Mild dish soap and warm water lift dust and grime just fine, and they won’t strip paint off metal covers or cloud plastic ones. Save the strong stuff for problems that actually need it.
What Should You Do Before You Start Cleaning?
Prep work is where most DIY vent cleanings go sideways. Skip it, and you’ll blow dust across your living room instead of into your vacuum.
Turn off the HVAC system completely before you remove a single screw. Field technicians recommend this for a simple reason: if the blower kicks on while a vent cover is off, it pulls loosened dust deeper into the ductwork and recirculates it through the house, which defeats the entire point of cleaning. If your thermostat has a “fan on” setting, make sure that’s switched off too, not just cooling or heating mode.
Once the system is off, protect the area around each vent. A drop cloth catches the dust and grime that inevitably falls when you pop a cover loose, and it saves you a separate cleanup afterward. If you’re working near carpet or hardwood, this step matters more than it seems.
While you’re removing covers, look inside the duct opening before you start scrubbing anything. Dark streaking, a musty smell, or actual pest droppings are signs you should stop and read the section on when to call a professional later in this guide. Cleaning around contamination without addressing the source just spreads it.
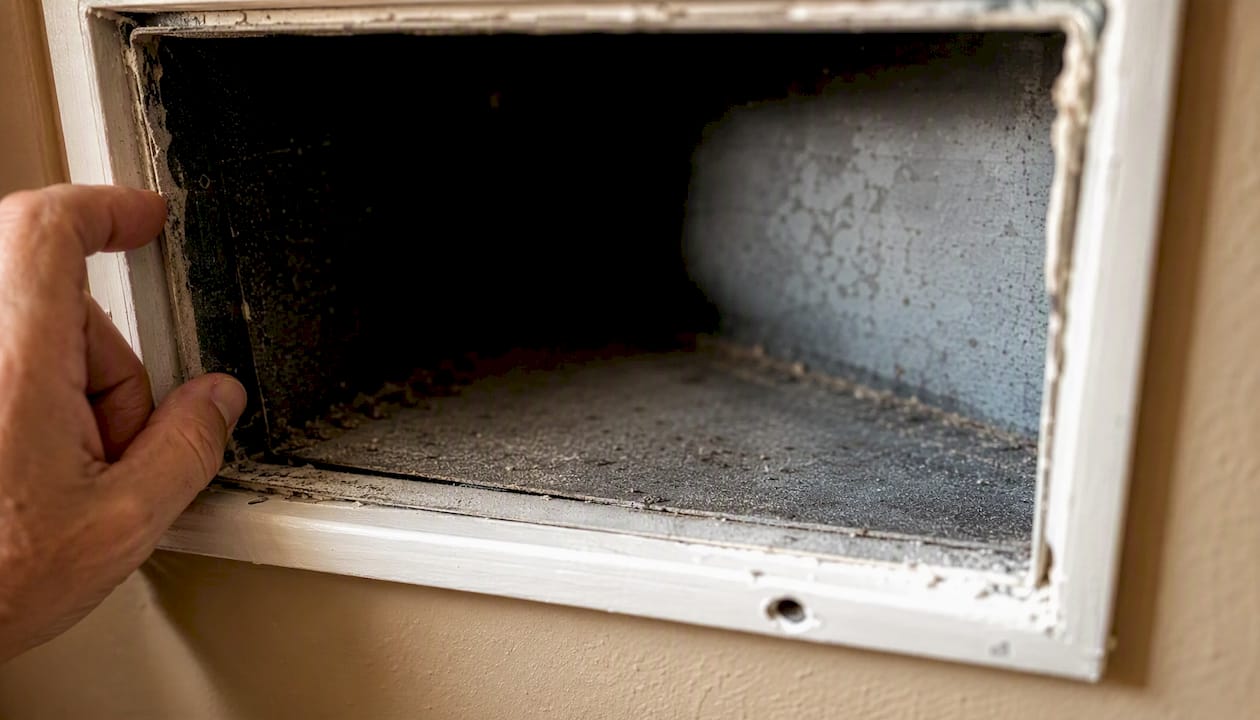
Last, plan for reassembly. Set screws in a small dish or magnetic tray so they don’t roll under the couch, and note which cover came from which room. It sounds obvious until you’re holding four identical vent covers an hour later with no idea which one goes where.
Steps to Clean AC Vents in Your Home
Here’s the actual process, start to finish. For an average-sized room, budget 15 to 20 minutes per vent. A full house with 10 to 12 registers usually takes two to three hours if you’re doing it thoroughly.
- Power down and remove the cover. With the HVAC system off, unscrew the vent grille and set it aside with the hardware in a labeled dish. Most residential vent covers use two to four screws.
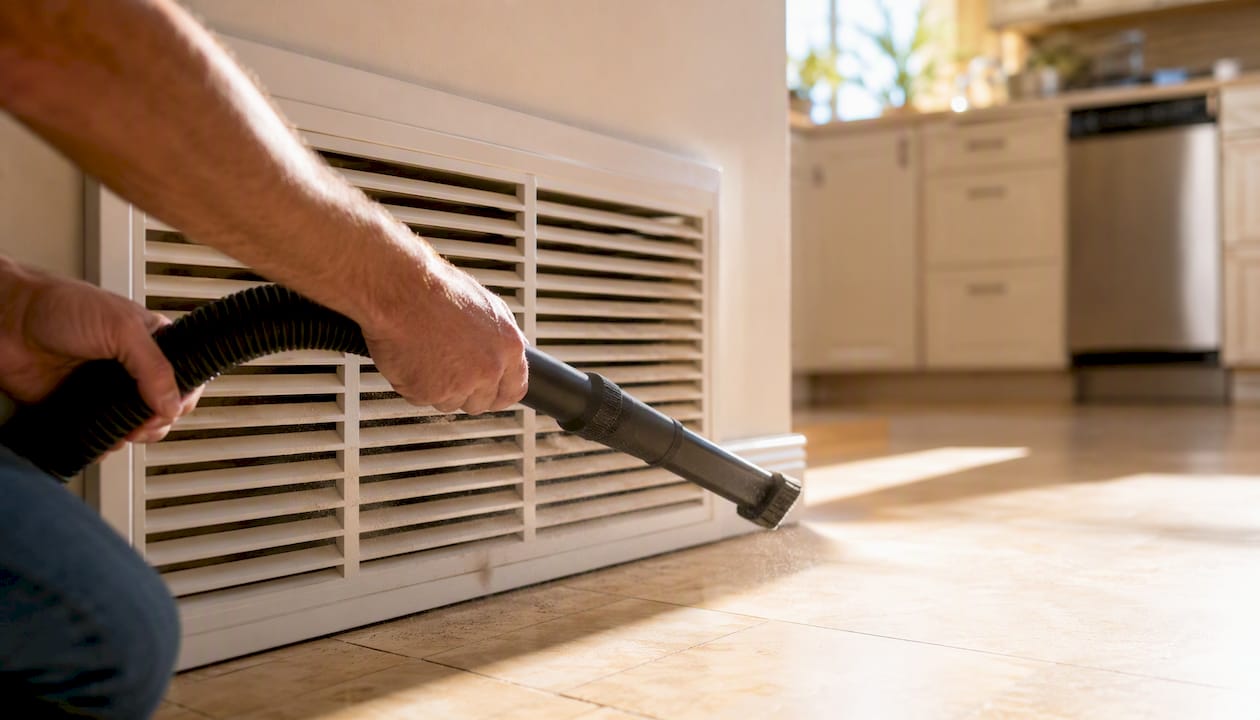
- Vacuum the opening. Using the crevice or brush attachment, vacuum the visible interior of the duct as far as your arm and tool comfortably reach. Don’t push a vacuum hose or any tool deep into the ductwork trying to chase dust further in. Anything past arm’s length belongs to a duct-cleaning professional, not a homeowner with a shop vac.
- Wash the vent cover. Soak it in warm, soapy water for 10 to 15 minutes, then scrub grime out of the slats with your soft brush. Rinse thoroughly and let it air dry completely before reinstalling. A damp cover trapped against ductwork is a small invitation for mold.
- Wipe the immediate opening. Once the duct interior is vacuumed, run a damp microfiber cloth around the edges of the opening to catch what the vacuum missed. Use the soft brush for any stuck-on buildup, working gently so you don’t push debris deeper into the duct.
- Reinstall and check airflow. Once the cover is bone dry, screw it back in place, restore power to the system, and run the fan for a minute to confirm air moves freely and nothing rattles.
While you’re at it, this is the ideal moment to check your air filter. A clean vent behind a dirty filter is a wasted effort, since the filter is what’s actually catching most of the airborne particles cycling through your HVAC system.
Pro Tip: Don’t forget your return vents. They’re usually larger and pull way more dust than supply vents because they’re constantly drawing air (and everything floating in it) back into the system. Vacuum them last, right before you swap or inspect your filter, so you’re not immediately recontaminating clean air with a dirty filter.
How Do You Clean Vents You Can’t Reach?
High ceiling vents, registers behind furniture, and recessed floor vents in tight corners need a slightly different approach than the step-by-step above.
- Use an extendable duster with a microfiber head to knock loose dust off ceiling vents without needing a ladder for every pass.
- If you do need a ladder, make sure it’s rated for your weight and set on level ground. Never balance on a chair, a stack of boxes, or a stool with wheels to reach a vent.
- For vents you genuinely can’t remove, vacuum from the room side using a crevice tool angled into the slats, and follow up with a short burst of compressed air to loosen dust, immediately capturing it with the vacuum nozzle positioned right at the opening.
- Cover nearby returns with a cloth or painter’s tape temporarily while you work on an adjacent vent, so loosened dust doesn’t just get pulled straight into another opening.
- If access requires climbing into an attic or onto a roof to reach a vent or duct run, that’s a job for a professional. Falls from ladders and roofs are common home injuries, and it’s not worth the risk for a vent you can get to safely another way.
How Often Should You Clean AC Vents?
Routine dusting of vent covers and the visible opening every six months keeps airflow clear and dust from building into a bigger problem — a maintenance cadence well explained in HVAC maintenance for commercial properties in London – UpKeep UK. A deeper clean, meaning the full wash-and-vacuum process outlined above, works well once a year for most households, or more often if you have pets, live near construction, or run your system heavily during LA’s long cooling season.
| Task | Frequency | Time Estimate |
|---|---|---|
| Dust vent covers | Every six months | 5–10 minutes per vent |
| Full wash and vacuum clean | Annually | 15–20 minutes per vent |
| Filter check and replacement | Every 1–3 months | 5 minutes |
| Whole-house deep clean | Annually | 2–3 hours for 10–12 vents |
Watch for these signs that it’s time to clean sooner than scheduled:
- Dark rings or streaking around the vent opening on your wall or ceiling
- Dust settling on furniture faster than usual, even right after cleaning
- Reduced airflow at the register compared to other vents in the house
- A musty or stale smell when the system kicks on
If you’ve cleaned the covers and the visible opening two or three times and the dust or odor keeps coming back, that’s usually not a surface problem anymore. It points to something happening further inside the ductwork, or occasionally an airflow issue at the air handler itself.
When Do You Need Professional Duct Cleaning?
Surface cleaning handles what you can see and reach. It doesn’t touch what’s happening 10 or 20 feet down a duct run, and it can’t fix a source problem like a slow leak or a failed seal. The EPA advises professional duct cleaning specifically when there’s persistent water damage, visible microbial growth, vermin, or debris buildup restricting airflow inside the ducts themselves.
Run through this checklist. If you answer yes to any of these, it’s time to call a contractor instead of reaching for another can of compressed air:
- Do you see mold, mildew, or a musty smell that doesn’t go away after cleaning the visible vent area?
- Have you found evidence of rodents or insects inside the ductwork?
- Is dust actively blowing out of registers even right after you’ve vacuumed them?
- Has your home had a water leak, flooding, or fire damage anywhere near the duct system?
- Does one or more rooms feel noticeably weaker on airflow no matter what you clean?
| Situation | DIY Vent Cleaning | Professional Duct Cleaning |
|---|---|---|
| Dusty vent covers, no other symptoms | Handles it | Not needed |
| Visible mold or water stains inside ducts | Not sufficient | Required |
| Persistent dust discharge after cleaning | Not sufficient | Recommended |
| Vermin evidence in ductwork | Not sufficient | Required |
| Reduced airflow in specific rooms | Partial help | Recommended for diagnosis |
A review from federal health and safety researchers found limited evidence that routine duct cleaning improves air quality across the board. That’s not an argument against ever cleaning ducts. It’s a reminder that cleaning only helps when there’s an actual contamination source to remove, not as a blanket fix applied on a schedule regardless of what’s really going on inside your system.
When a professional does clean your ducts, the process looks different from what you did with your vacuum and microfiber cloth. Industry standards from NADCA call for mechanical agitation to dislodge debris from duct walls, combined with vacuum capture strong enough to pull that debris out of the system entirely, followed by visual verification that the work actually removed the contamination. That’s a different scale of equipment than anything you’ll have at home, which is exactly why it costs more and takes longer.
Ernie’s Field Notes on Filters, Inspections, and Prevention
After 15 years running HVAC calls across Los Angeles, I’ve noticed the same pattern over and over: the homeowners with the fewest duct problems aren’t the ones who clean vents most obsessively. They’re the ones who take care of their filter.
- Filter strategy: Use the highest MERV rating your system can handle, and MERV 13 is a solid target for most residential systems if your equipment supports it. Check the filter monthly and replace it every one to three months depending on your household (pets and allergies push you toward the shorter end).
- What we check on an inspection: coil condition, drain pan buildup, whether the filter actually fits snugly in its slot (a loose fit lets unfiltered air bypass it entirely), and the condition of visible duct seams and insulation.
- Prevention beats cleaning: seal duct connections properly during any remodeling work, keep furniture and rugs away from return vents, and stay on top of basic housekeeping. Dust that never enters the system is dust you’ll never have to clean out of it.
- Time and cost reality: a homeowner cleaning session runs a few hours for a whole house. Professional source-removal duct cleaning takes longer and costs more, because it involves specialized negative-pressure equipment, full containment of the work area, and verification that contamination was actually removed, not just moved around.
Pro Tip: If you do hire a contractor for duct cleaning, ask for before-and-after photos and confirm they follow NADCA-based methods. A legitimate crew won’t hesitate to show you proof of what they removed.
What I’d Want My Own Family to Know
Cleaning your vents yourself is one of the most useful hours you can spend on your home’s air quality, and I mean that as someone who’s spent 15 years watching people either overdo it or ignore it completely. The dish soap and microfiber cloth approach works. It really does. What I want homeowners to walk away understanding is the line between “my vents look dusty” and “something inside my ductwork isn’t right.”
At Upright Construction & HVAC, when we get called out for a system that’s been “cleaned three times and still smells off,” it’s rarely a cleaning problem. It’s usually a coil issue, a drain pan that’s not draining, or a duct seam that opened up during a past renovation. We check those source issues on every inspection, because a spotless vent cover doesn’t mean much if the air behind it is coming from a problem area.
Get a Professional Inspection When DIY Isn’t Enough
There’s a real limit to what a vacuum and a bucket of soapy water can fix, and that’s not a knock on doing it yourself. It’s just physics. Once a problem lives inside the ductwork, at the coil, or in a duct seam you can’t see, no amount of vent scrubbing reaches it.

That’s where Upright Construction & HVAC comes in. Our technicians handle full system inspections, professional duct cleaning, and same-day HVAC repair across the greater Los Angeles area, with 24/7 emergency response when something can’t wait. We also help homeowners set up ongoing preventive maintenance so filter changes, coil checks, and airflow inspections happen on a schedule instead of only after something goes wrong. If you ran through the checklist above and found mold, water damage, or dust that won’t quit, don’t keep cleaning around the problem. Give us a call and we’ll take a look before it turns into a bigger repair.
Sources
- Should You Have the Air Ducts in Your Home Cleaned? | US EPA
- ACR: The NADCA Standard, 2021 edition
- DOHS Fact Sheet On HVAC Duct Cleaning
- How to Clean Your Air Vents | Martha Stewart
FAQ
Can you clean your AC vents yourself?
Yes. Vent covers and the visible duct opening are safe for homeowners to clean with a vacuum, mild soap, and basic tools. Deeper ductwork contamination requires professional equipment and falls outside a DIY job.
What can I use to clean the air vents in my house?
A vacuum with crevice and brush attachments, warm water with mild dish soap, and microfiber cloths handle most vent cleaning jobs. Avoid harsh solvents or bleach, which can damage paint and plastic covers.
How do I know if my AC ducts need to be cleaned by a professional?
Persistent water damage, visible mold, vermin, or dust that keeps blowing from registers even after cleaning are signs the EPA associates with needing professional duct cleaning rather than surface maintenance.
How do I clean air vents I can’t reach?
Use an extendable duster or long-handled brush for high vents, and vacuum from the room side with a crevice tool angled into the slats. Never stand on unstable furniture, and call a professional if the vent requires attic or rooftop access.
How often should I clean my home’s air vents?
Dust vent covers roughly every six months, and do a full soap-and-vacuum clean once a year, or more often with pets or heavy system use.