Our Services
AC Won't Turn On? Check These 7 Things First
Is your AC not turning on? Discover seven essential checks to troubleshoot the issue before calling a professional for help.
- CSLB C-20 Licensed
- NATE Certified
- EPA 608 Certified
- Licensed & Insured
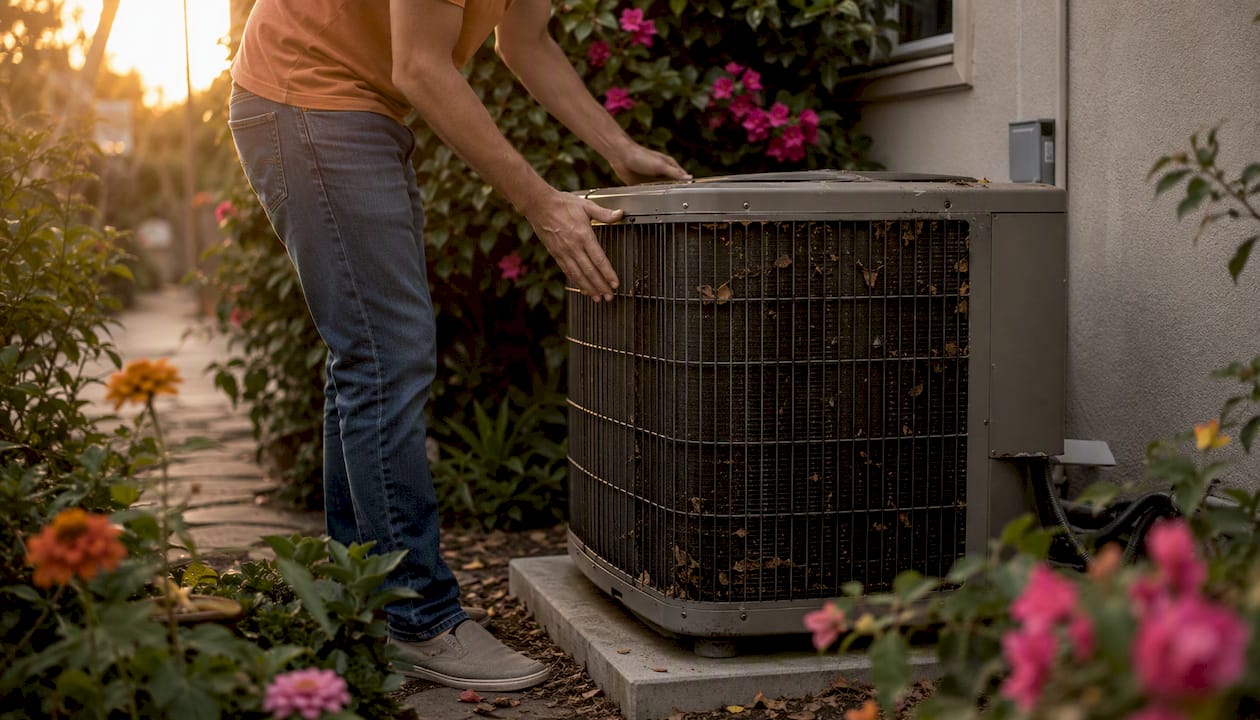
Check the thermostat, the breaker, and the outdoor disconnect first. If those are fine and you’re still getting nothing, stop and call a licensed HVAC tech. Here’s your fast, safe starting point:
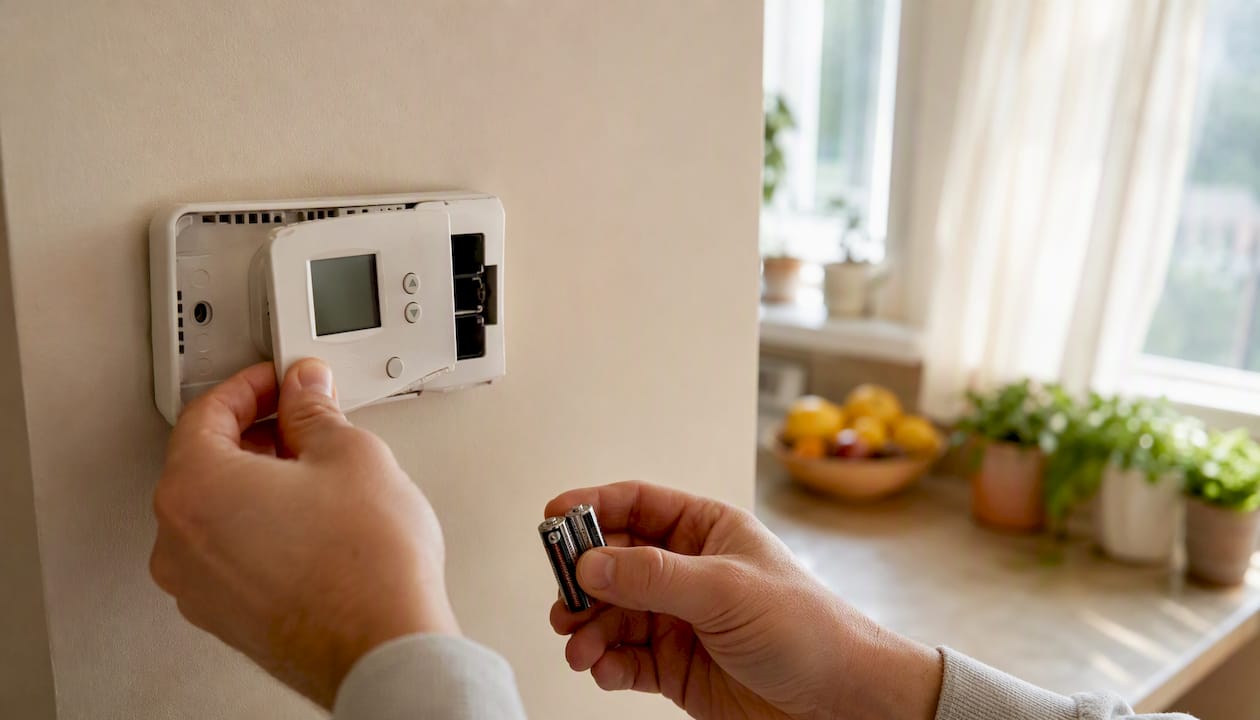
- Thermostat settings: Set it to COOL, drop the setpoint at least 5°F below room temperature, and swap in fresh batteries. Dead batteries are one of the most common reasons an air conditioner won’t start, and it takes 30 seconds to rule out.
- Circuit breaker: Go to your main panel and look for a tripped double-pole breaker labeled “AC” or “Condenser.” A tripped breaker sits between ON and OFF. Flip it fully OFF, then back ON once. If it trips again, stop.
- Outdoor disconnect: The gray box mounted near your outdoor unit holds a fuse block or pull-out disconnect. Pull it out, inspect the fuses visually, and reseat it firmly. Carrier’s troubleshooting guidance confirms these three checks resolve a large share of no-start calls before a tech ever arrives.
- Indoor power switch: There’s usually a wall switch near the air handler that looks like a light switch. Make sure it’s ON.
- Condensate float switch: If the drain pan under your air handler is full of water, a safety float switch cuts power to the system. Empty the pan and clear the drain line.
Stop immediately and call a pro if you smell burning or electrical odors, see ice on the refrigerant lines, notice visible wiring damage, or the breaker trips a second time after reset. These are not homeowner fixes. Use the emergency AC repair checklist to gather details before you call.
Key Takeaways
The fastest path to a working AC is checking thermostat settings, the circuit breaker, and the outdoor disconnect first; stop immediately and call a licensed tech if you smell burning, see ice, or the breaker trips twice.
| Point | Details |
|---|---|
| Start with the basics | Check thermostat mode, setpoint, and batteries before assuming a mechanical failure. |
| Breaker reset: once only | Reset a tripped breaker one time; a second trip means a real electrical fault — stop. |
| Filter and drain matter | A clogged filter or full condensate pan can shut the system off as a safety measure. |
| Capacitors are dangerous | They hold 250–440 volts after power is cut; never open the electrical compartment yourself. |
| Upright Construction & HVAC | Provides same-day and 24/7 emergency HVAC repair across Los Angeles with EPA-certified techs. |
Why won’t your AC turn on? The most common causes explained
Most no-start problems fall into a handful of categories. Knowing what each one looks and sounds like helps you narrow it down fast.
Thermostat problems
A blank thermostat screen almost always means dead batteries or a tripped indoor breaker, not a failed unit. Wrong mode (set to HEAT or FAN instead of COOL) and a setpoint above room temperature are equally common. Less obvious: a loose wire at the thermostat’s terminal block can cut communication between the thermostat and the air handler entirely, making the system appear dead even when everything else is fine. Energy.gov’s thermostat guidance is clear that mode, setpoint, and power are the first things to verify.
Power supply problems
Your AC runs on a dedicated 240-volt circuit. A tripped double-pole breaker, a blown fuse in the outdoor disconnect box, or a power surge can cut that circuit without touching anything else in the house. After a storm or grid fluctuation, the outdoor unit’s internal fuses or a high-pressure safety switch may also trip, leaving the indoor blower running while the outdoor unit sits silent.
Airflow and drain issues
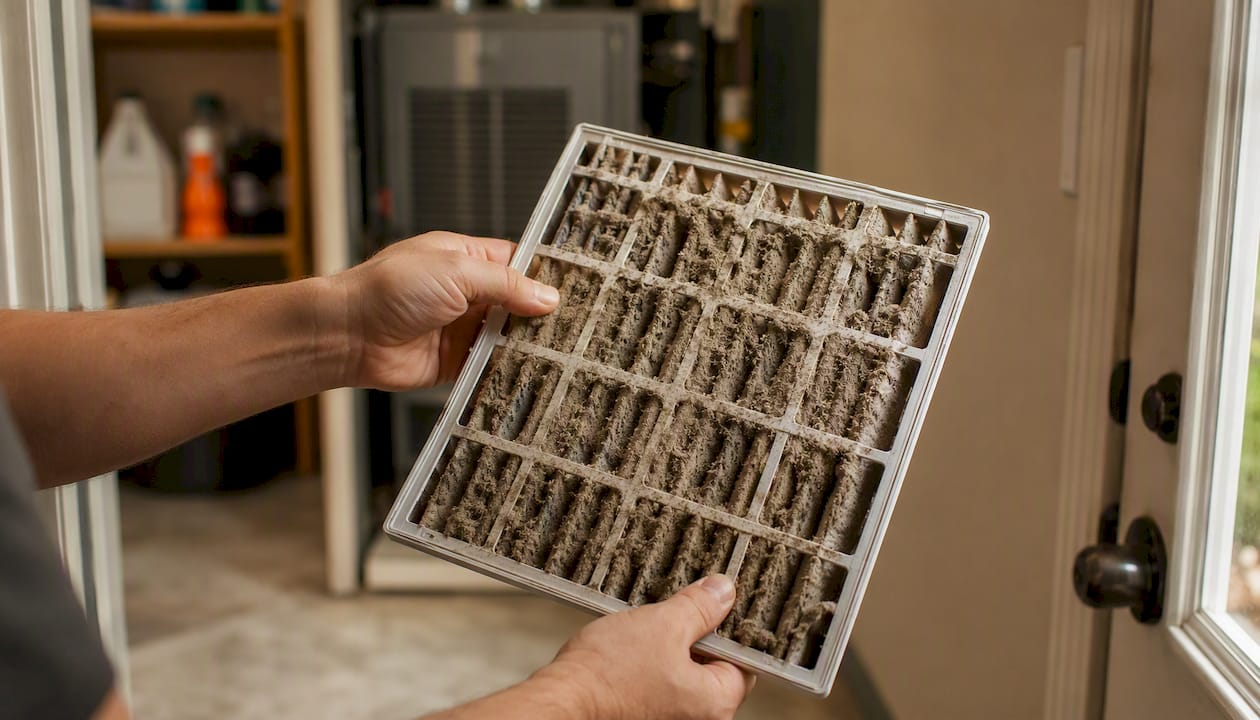
A clogged air filter starves the system of airflow, which causes the evaporator coil to freeze solid. Once frozen, the system either shuts itself off or blows warm air despite running. Pull the filter out and hold it up to a light. If you can’t see light through it, replace it before you do anything else. A clogged condensate drain line is the other common airflow culprit: water backs up into the drain pan, the float switch trips, and the system cuts off as a safety measure.
Starting components: capacitors and contactors
Trane’s troubleshooting resource identifies a failed start or run capacitor as one of the most frequent causes of a unit that hums but won’t spin up. You’ll hear a low hum from the outdoor unit, but the fan blade won’t turn. A failed contactor produces a similar symptom: the system gets a signal to start, but the high-voltage switch that actually energizes the compressor and fan doesn’t close. Both are professional repairs.
Outdoor condenser symptoms
Stand near the outdoor unit when the system should be running. A fan that’s completely still, a buzzing sound with no motor movement, or a unit that starts briefly and shuts off within a minute or two all point toward electrical or mechanical failure in the condenser. Debris packed around the unit, overgrown vegetation blocking airflow, or physical damage to the fins can also trigger a safety lockout.
Refrigerant and compressor problems
Hissing or bubbling sounds near the refrigerant lines, ice forming on the copper lines or the indoor coil, and warm air blowing despite the system running are the three clearest signs of a refrigerant issue. Low refrigerant doesn’t just reduce cooling — it can cause the compressor to overheat and shut down on its safety switch. These repairs require an EPA Section 608-certified technician and are never a DIY job.
Wiring and electrical smells
A burning or electrical smell from your AC is a hard stop. Turn the system off at the thermostat and at the breaker, and don’t turn it back on. Melted insulation, a failing motor winding, or an arcing connection can cause a fire. Call an HVAC professional or licensed electrician immediately. See the signs your AC needs immediate repair for a quick reference.
Pro Tip: If your breaker trips twice in the same day, don’t reset it a third time. A breaker that keeps tripping is protecting you from a real electrical fault. Repeated resets can damage the breaker itself and create a fire hazard.
Safe, step-by-step AC troubleshooting you can do at home
Work through these in order. Each step takes only a few minutes and rules out the most common causes before moving to the next.
- Check the thermostat. Set it to COOL, lower the setpoint 5°F below the current room temperature, and replace the batteries. Wait 3 minutes for the system to respond before concluding it failed.
- Check the indoor power switch. Locate the wall switch near your air handler or furnace. If it’s OFF, flip it ON and wait another 3 minutes.
- Check the main panel breaker. Find the double-pole breaker for the AC or condenser. If it’s tripped (sitting in the middle position), flip it fully OFF, then firmly back ON. Do this once. If it trips again, stop here.
- Check the outdoor disconnect. Open the gray disconnect box near the outdoor unit. Pull out the fuse block, inspect the fuses for visible burn marks or breaks, and reseat it. If you have a multimeter, test each fuse for continuity.
- Inspect and replace the air filter. A filter choked with dust blocks airflow enough to freeze the coil and trigger a safety shutoff. Replace it with the correct size and MERV rating for your system.
- Check the condensate drain pan. Look under the indoor air handler. If the pan has standing water, the float switch has tripped. Use a wet/dry vacuum to clear the drain line at the access port near the pan. Once the pan is dry, the float switch resets automatically.
- Listen at the outdoor unit. With the system calling for cooling, stand near the condenser. A hum with no fan movement suggests a bad capacitor. Do not open the electrical compartment. Capacitors can hold 250–440 volts even after power is disconnected, making them genuinely dangerous for anyone without proper discharge tools.
If you’ve worked through all seven steps and the system still won’t start, the problem is inside the electrical compartment or the refrigerant circuit. That’s where you stop and call a tech.
What to do when the indoor fan runs but the outdoor unit won’t start
This specific symptom — indoor blower running, outdoor unit completely silent — is one of the clearest diagnostic signals your system gives you. Bryant’s troubleshooting guidance points to four likely causes: a power problem at the outdoor unit, a bad capacitor, a failed contactor, or a safety lockout.
Here’s what you can safely check from the outside:
- Outdoor disconnect: Confirm the disconnect box is closed and the fuse block is fully seated. A partially pulled disconnect cuts power to the outdoor unit only, which is exactly what this symptom looks like.
- Visible debris: Clear leaves, grass clippings, or any material packed against the condenser fins. A blocked condenser can trip a high-pressure safety switch and shut the outdoor unit down while leaving the indoor blower running.
- Vegetation clearance: HVAC manufacturers generally recommend at least 2 feet of clearance around the outdoor unit on all sides. Overgrown shrubs or vines can restrict airflow enough to cause repeated safety shutoffs.
- Physical damage: Look for bent fins, dents, or obvious damage to the refrigerant lines. Don’t touch the copper lines.
- Buzzing with no fan movement: This is the capacitor symptom. The contactor has closed and the motor is trying to start, but the capacitor isn’t providing the starting torque. Do not open the panel.
What you should not do: don’t remove the electrical access panel, don’t touch the capacitor, don’t attempt to spin the fan blade manually while power is on, and don’t touch the refrigerant lines. A worn or failed fan motor can also cause this symptom, and that diagnosis requires a tech with a clamp meter.
When to stop troubleshooting and call a licensed HVAC tech
Some problems are genuinely dangerous to touch without training. Others are legally restricted. Here’s where the line is.
Call a pro immediately for any of these:
- Burning or electrical smell from any part of the system
- Breaker trips a second time after reset
- Visible ice on refrigerant lines or the indoor coil
- Water pooling around the indoor unit
- Hissing or bubbling sounds near copper lines
- Grinding or screeching from the outdoor unit
- Any symptom involving the electrical compartment
A licensed HVAC technician will run a multi-point diagnostic on the first visit: voltage and amperage tests at the disconnect and capacitor, contactor resistance check, refrigerant pressure test (which requires EPA 608 certification), control board inspection, compressor amp draw, and condensate system check. That full diagnostic typically takes 45–90 minutes.
For refrigerant work specifically, federal law requires an EPA Section 608-certified technician to handle, recover, or recharge refrigerant. There’s no legal path for a homeowner to do this themselves.
Typical repair costs and timelines
| Repair Type | Typical Time | Rough Cost Range |
|---|---|---|
| Capacitor replacement | 30 minutes | $200–$350 |
| Contactor replacement | 30 minutes | $200–$350 |
| Condensate drain clearing | 30–45 min | $100–$200 |
| Thermostat wiring repair | 30–90 min | $150–$300 |
| Refrigerant leak diagnosis + recharge | 2–4 hours | $500–$2,000 |
| Compressor replacement | 4 hours | $500–$2,000 |
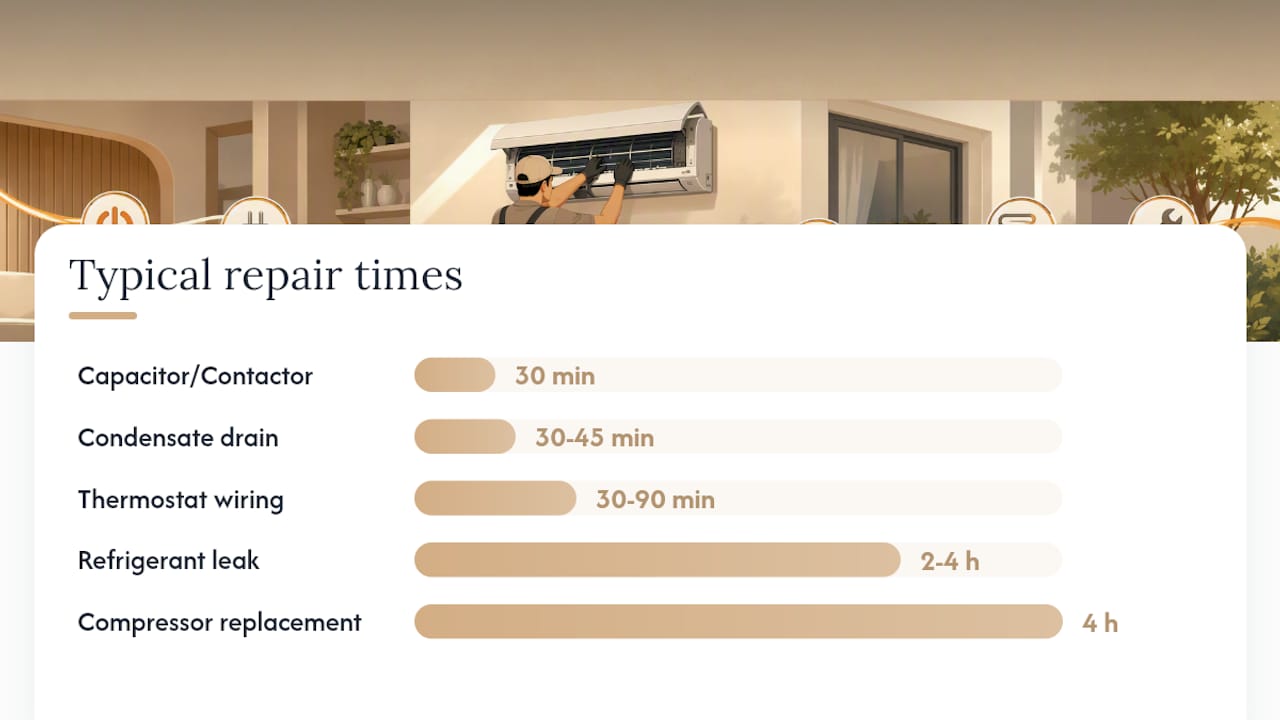
Refrigerant leak repair and recharge can range from roughly $500 to $2,000 depending on the leak location and system size. Compressor replacement sits at the high end and often raises the question of whether replacement makes more sense than repair. See the 9 signs your HVAC needs replacement guide if your system is older than 12–15 years and facing a major repair.
Acting quickly on short-cycling or repeated start/stop behavior matters. A minor capacitor issue left unaddressed can escalate to compressor failure, which turns a $200 repair into a multi-thousand-dollar job. For a deeper look at what drives HVAC emergency costs, that resource breaks down the main cost factors clearly.
Simple maintenance that prevents most no-start problems
Most of the failures described above are preventable. Here’s a straightforward schedule:
Monthly:
- Check and replace the air filter (every 1–3 months depending on filter type and household dust levels)
- Glance at the condensate drain pan for standing water
Seasonally (before cooling season starts):
- Clear debris and vegetation from around the outdoor unit
- Confirm the outdoor disconnect is fully seated
- Check that the thermostat is set correctly and batteries are fresh
- Inspect the condensate drain line and flush it with a cup of diluted bleach to prevent algae buildup
Annually (requires a licensed technician):
- Capacitor and contactor testing
- Refrigerant pressure check
- Electrical connection tightening
- Coil cleaning (indoor and outdoor)
- Blower motor and belt inspection
For a complete breakdown of what belongs on your homeowner checklist versus what requires a tech, the HVAC maintenance checklist for homeowners covers both lists in detail. Pairing that with a preventive HVAC maintenance plan keeps most systems running reliably for 15–20 years.
Pro Tip: Schedule your annual professional tune-up in March or April, before the first heat wave hits. Technicians are fully booked by June in most Los Angeles neighborhoods, and a system that hasn’t been serviced going into summer is the one most likely to fail on the hottest day of the year.
Keeping your home’s systems in good shape goes beyond HVAC. Pairing your seasonal AC prep with a broader home security and maintenance checklist is a practical way to catch issues across the whole property before they become emergencies.
What I’ve learned after 15 years of AC calls in Los Angeles
Here’s something I tell every homeowner who calls us: the thermostat, the breaker, and the filter solve more than half of all “my AC won’t turn on” calls. Not because homeowners are careless, but because these things fail quietly and often at the worst possible time.
What I see people get wrong most often is the reset loop. They reset the breaker, the system runs for 20 minutes, trips again, and they reset it a second time. By the time we arrive, the compressor has been stressed through three or four hard starts and what was a $200 capacitor job is now a conversation about compressor replacement. One reset is diagnostic information. Two resets is damage.
The other mistake is waiting. A system that short-cycles, hums without starting, or blows warm air on a 95°F day in the San Fernando Valley is telling you something specific. The longer you wait, the more expensive the answer usually gets.
We’ve been doing this in Los Angeles for over 15 years. Our diagnostics are transparent, our pricing is upfront, and we’re available 24/7 for emergencies because we know a failed AC in July isn’t something you schedule for next week.
Upright Construction & HVAC: same-day HVAC service across Los Angeles
When the quick checks don’t solve it, you need a licensed tech on-site fast.

Upright Construction & HVAC provides same-day and 24/7 emergency HVAC repair across the greater Los Angeles area, including the San Fernando Valley, Reseda, and surrounding neighborhoods. Our technicians carry EPA 608 certification for refrigerant work, and every diagnostic visit includes a full multi-point inspection with transparent, upfront pricing before any repair begins. Financing is available for larger repairs like compressor replacement or full system installation. Before you call, note your unit’s age, the symptoms you observed (humming, silence, short cycling), and any recent events like power outages or storms. That information cuts diagnostic time significantly. To request service or ask a question, visit Uprightch or call our emergency line directly.
Sources
- AC unit not turning on | Carrier
- AC not turning on | Trane
- Energy
- Section 608 technician certification requirements | EPA
FAQ
What is the first thing to check when my AC stops working?
Check the thermostat first: confirm it’s set to COOL, the setpoint is below room temperature, and the batteries are fresh. Then check the circuit breaker and outdoor disconnect before assuming a mechanical failure.
How do I reset my air conditioner?
Turn the thermostat off, flip the AC breaker fully OFF at the main panel, wait 30 seconds, then flip it back ON. Set the thermostat back to COOL and give the system 3 minutes to respond. Reset the breaker only once.
How do I know if my AC fuse is blown?
Open the outdoor disconnect box near the condenser and pull out the fuse block. Look for a visible break or burn mark inside the fuse. A multimeter set to continuity will confirm it: no continuity means the fuse is blown and needs replacement.
How do I force my AC to turn on?
You can’t safely force a system that has shut off on a safety switch. Run through the basic checks (thermostat, breaker, disconnect, filter, drain pan) in order. If those are all fine and the system still won’t start, a component like the capacitor or contactor has likely failed and needs a technician.
When should I call a professional instead of troubleshooting myself?
Call a licensed HVAC tech if you smell burning, see ice on the refrigerant lines, hear hissing near the copper pipes, or if the breaker trips a second time after reset. Any repair involving the electrical compartment, capacitors, or refrigerant requires a professional.
Recommended
Ready to get started?
Licensed, insured & available 24/7 across Los Angeles and the San Fernando Valley.