
- What does HVAC blower motor maintenance actually involve?
- What tools and preparations do you need before starting?
- How do you inspect, clean, and lubricate a blower motor?
- What are the warning signs of a blower motor problem?
- What preventive habits extend blower motor life?
- Key Takeaways
- What I’ve learned after 15 years of blower motor calls
- Upright Construction & HVAC is ready to help with your blower motor
- FAQ
- Recommended
TL;DR:
- Proper HVAC blower motor maintenance involves regular inspection, cleaning, and lubrication to prevent system failure and extend motor lifespan. Neglecting this maintenance increases energy bills, shortens component life, and may lead to costly repairs or replacements. Regular professional diagnostics, combined with routine DIY tasks like filter changes and visual checks, ensure optimal system performance and savings.
Proper HVAC blower motor maintenance is defined as the regular practice of inspecting, cleaning, lubricating, and monitoring your system’s fan motor to keep it running at full efficiency and prevent unexpected breakdowns. A neglected blower motor strains your entire HVAC system, drives up energy bills, and shortens the life of components that cost hundreds to replace. Well-maintained motors last 10–20 years, while neglected ones often fail in under 10. The good news is that most of the upkeep homeowners can handle themselves, with professional help reserved for the jobs that genuinely need it.
What does HVAC blower motor maintenance actually involve?
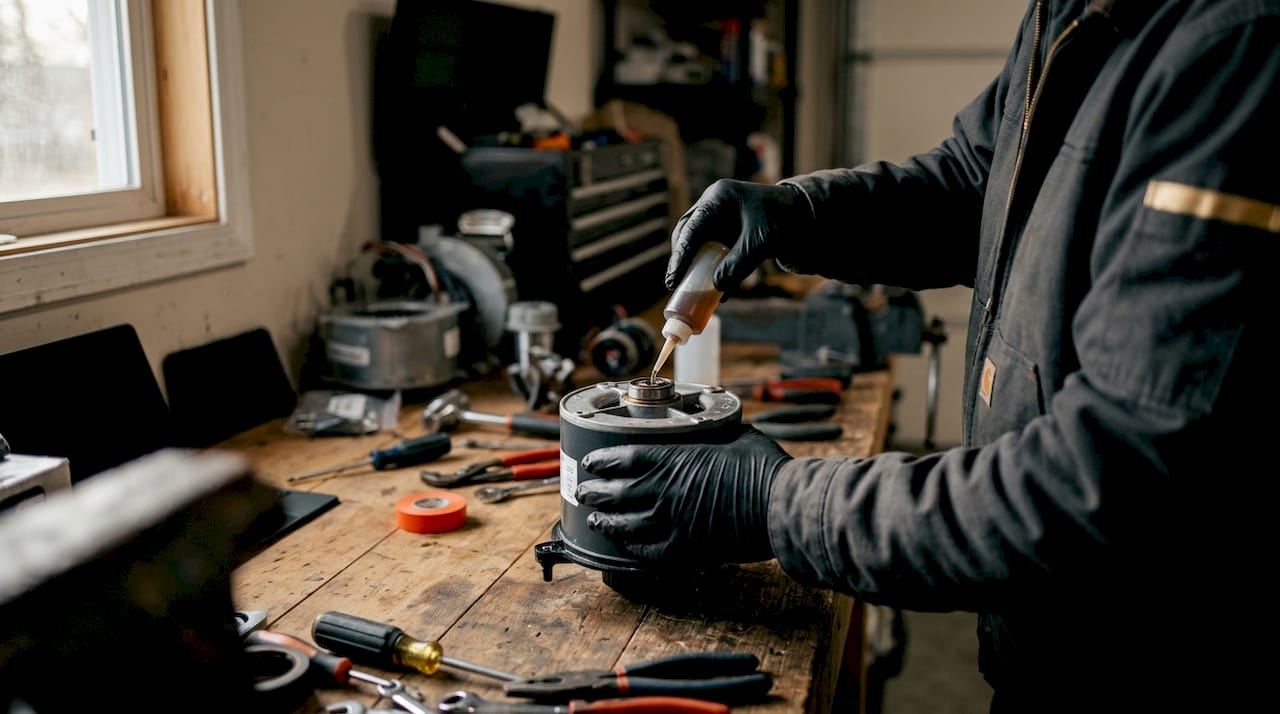
HVAC blower motor maintenance covers four core tasks: visual inspection, cleaning, lubrication, and electrical monitoring. Each task targets a specific failure point. Dust buildup on the blower wheel reduces airflow and forces the motor to work harder. Dry bearings create friction that generates heat and noise. Loose electrical connections cause intermittent shutdowns. Catching these issues early is far cheaper than replacing a motor. Deep cleaning the blower wheel alone reduces the risk of major component failure by 30–40% and prevents up to 20% efficiency loss from dust accumulation.
Regular upkeep also protects your wallet. Professional maintenance runs $80–$250, while motor replacement costs $500–$1,500. That math makes a strong case for staying ahead of problems rather than reacting to them.
What tools and preparations do you need before starting?
Starting without the right tools is the fastest way to create a bigger problem. Gather these before you touch anything:
- A multimeter (for basic voltage and continuity checks)
- A vacuum with a narrow attachment
- Soft brushes or an old paintbrush for dust removal
- SAE 10 or SAE 20 non-detergent electric motor oil
- A flashlight or headlamp
- Screwdrivers (flathead and Phillips)
- Safety glasses and gloves
The single most important step before any inspection is cutting power to the unit. Turn off the thermostat, then shut off the breaker for your HVAC system. Wait at least five minutes before opening any panels. Capacitors inside the unit store electrical charge even after power is cut, and touching them without waiting is dangerous.
Pro Tip: Take a photo of all wiring connections before you disconnect anything. That photo is your roadmap when you put it back together.
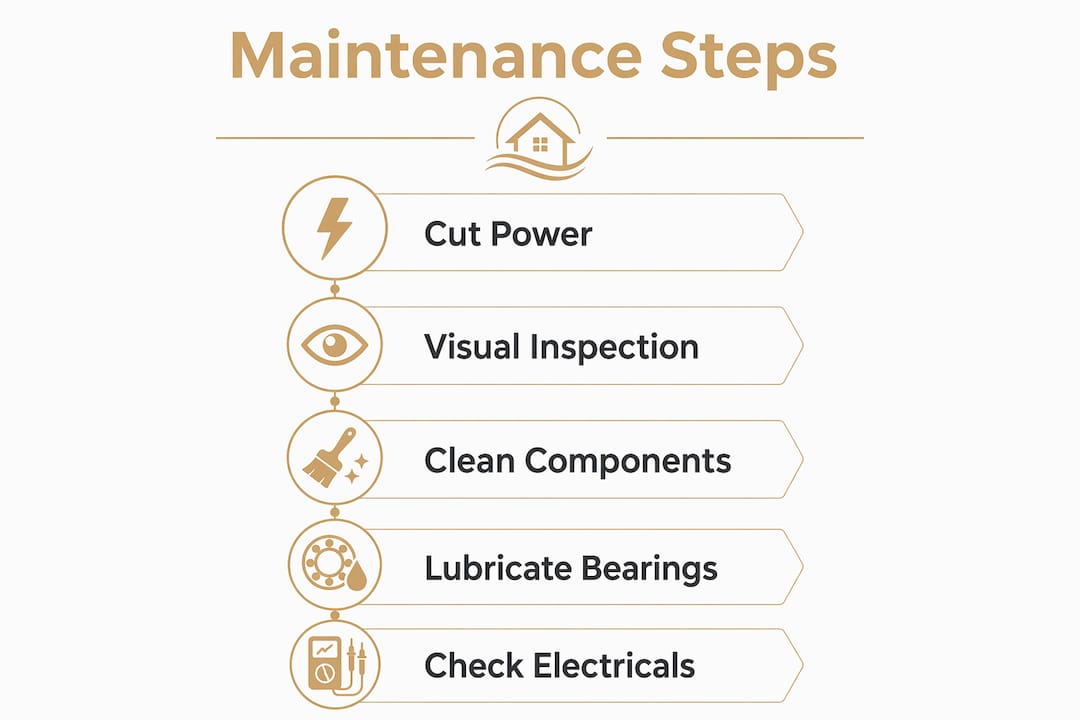
Upright Construction & HVAC recommends inspecting your blower motor at least once a year, ideally in spring before cooling season and again in fall before heating season. Replace your air filter every 30–60 days if you have pets or live in a dusty area. Air filter neglect is the primary cause of blower motor strain, and it is also the easiest thing to fix.
How do you inspect, clean, and lubricate a blower motor?
This is the core of any blower motor service guide. Follow these steps in order.
Step-by-step inspection and cleaning
- Cut power at the breaker. Confirm the system is off before opening the air handler cabinet.
- Remove the access panel. Most panels are held by two to four screws or simple clips.
- Locate the blower assembly. It sits inside the air handler, usually below or beside the evaporator coil.
- Inspect visually. Look for heavy dust on the blower wheel blades, debris inside the housing, frayed wires, or corrosion on electrical connections.
- Vacuum the blower wheel. Use the narrow attachment to pull dust off each blade. Buildup on the wheel is uneven and throws the motor off balance, causing vibration and noise.
- Use a soft brush for stubborn debris. Work carefully between the blades without bending them.
- Wipe down the motor housing. A dry cloth removes surface dust from the motor body.
- Check wiring connections. Look for loose terminals or discolored wires. Discoloration signals heat damage.
Lubrication: what to use and how much
Not every blower motor needs lubrication. ECM (electronically commutated motor) motors are permanently sealed and require no oiling. PSC (permanent split capacitor) motors, which are the older and more common type in many homes, have oil ports that need annual attention.
| Motor type | Lubrication needed | Oil type | Amount |
|---|---|---|---|
| PSC (sleeve bearing) | Yes, annually | SAE 10 or SAE 20 non-detergent | 3–5 drops per port |
| ECM (brushless) | No | N/A | N/A |
| Ball bearing motors | No | N/A | N/A |
PSC motors require SAE 10 or SAE 20 non-detergent electric motor oil applied annually. Use 3–5 drops per oil port, never more. Over-oiling attracts dust and creates a paste that clogs the bearing.
Pro Tip: Never use WD-40 on a blower motor bearing. WD-40 strips existing lubrication and causes bearing seizure, turning a $20 maintenance task into a $500 repair.
Capacitor and electrical connection checks
A quick visual check of the capacitor is within reach for most homeowners. Look for a bulging top, oil leakage, or burn marks on the capacitor body. Any of those signs means the capacitor has failed. A failed capacitor reads more than 6% below its rated µF value on a multimeter set to capacitance mode. Capacitor failure is commonly misdiagnosed as motor failure, and replacing a capacitor costs a fraction of replacing a motor.
What are the warning signs of a blower motor problem?
Knowing when to stop DIY work and call a professional is just as important as knowing how to clean. Watch for these symptoms:
- Grinding or squealing noise. This points to bearing wear, not dirt. Cleaning will not fix it.
- Burning smell. Electrical overheating or winding failure. Shut the system off immediately.
- Weak or no airflow. Could be a dirty wheel, a failed capacitor, or a seized motor.
- Breaker trips repeatedly. The motor is drawing too much current, a sign of mechanical binding or winding failure.
- Motor starts then stops. Intermittent shutdowns often signal overheating or a failing capacitor.
Grinding noise, burning smell, or intermittent shutdowns indicate bearing failure or electrical overheating and require immediate power shutdown and professional diagnostics. Professional diagnostics typically cost $80–$200, and that fee is often waived when the technician completes the repair.
Most homeowner blower motor noises are not solved by cleaning alone. Mechanical issues like bearing wear cause persistent noise that requires motor replacement, not a brush and a vacuum. Cleaning helps when noise comes from debris hitting the blower wheel. It does nothing for a worn bearing. Knowing the difference saves you time and prevents you from delaying a repair that is only getting worse.
Amperage draw above 10% over the motor’s nameplate full-load amps signals mechanical binding or winding failure. A clamp meter can measure this, but interpreting the reading and acting on it is a job for a licensed technician. ECM motors add another layer of complexity. ECM motors require professional handling because of their complex electronics. Standard capacitor tests and most DIY fixes apply only to PSC motors. If your system has an ECM motor and something seems wrong, call a pro.
You can find a broader list of symptoms that signal system-level trouble in this guide to signs your HVAC needs replacement.
What preventive habits extend blower motor life?
Reactive repairs always cost more than preventive care. Proactive maintenance in hot climates prevents emergency motor replacements during peak seasons when labor costs and repair delays are highest. Los Angeles homeowners face this reality every summer.
Build these habits into your routine:
- Change air filters every 30–60 days in homes with pets, dust, or high foot traffic. A clogged filter forces the motor to work harder and shortens its life.
- Keep supply and return vents clear. Furniture blocking vents creates back pressure that strains the blower.
- Schedule a professional tune-up once a year. A technician checks amperage draw, tests the capacitor with a proper meter, and catches issues a visual inspection misses.
- Log every maintenance task. Write down filter change dates, oil application dates, and any unusual sounds or smells. A maintenance record gives a technician context and helps you spot patterns before they become failures.
- Listen to your system between seasons. A change in sound or airflow during mild weather is easier and cheaper to address than the same problem in July.
Following a structured HVAC maintenance checklist keeps these tasks from slipping through the cracks across the year.
Key Takeaways
Consistent blower motor upkeep, combining regular cleaning, correct lubrication, and timely professional diagnostics, is the most reliable way to extend motor life and avoid emergency repair costs.
| Point | Details |
|---|---|
| Clean the blower wheel annually | Dust buildup reduces efficiency by up to 20% and increases failure risk by 30–40%. |
| Use the right oil for PSC motors | Apply 3–5 drops of SAE 10 or SAE 20 non-detergent oil per port; never use WD-40. |
| Test the capacitor before replacing the motor | A failed capacitor mimics motor failure and costs far less to replace. |
| Know your motor type | ECM motors need no lubrication and require professional service for any electrical issue. |
| Change filters every 30–60 days | Air filter neglect is the leading cause of blower motor strain and early failure. |
What I’ve learned after 15 years of blower motor calls
The call I get most often goes something like this: “My AC is making a noise, I cleaned it myself, but it’s still doing it.” Nine times out of ten, the homeowner did everything right. They vacuumed the wheel, wiped it down, and put it back together. The problem is that cleaning fixes a dirty motor, not a worn one. Those are two different things, and the sound tells you which one you’re dealing with.
What I tell every homeowner is this: pay attention to when the noise started and what it sounds like. A rattling that showed up after a windy day is probably debris. A grinding that got worse over three months is a bearing. One is a cleaning job. The other is a replacement. Treating them the same way wastes time and delays a repair that is only getting more expensive.
The other thing I see constantly is homeowners skipping the capacitor check and going straight to assuming the motor is dead. A bad capacitor costs $20–$80 to replace. A motor costs $500–$1,500. Technicians test the capacitor first because failure there mimics motor failure almost perfectly. That one step saves homeowners real money.
My honest advice: do the cleaning and filter changes yourself. They are straightforward and genuinely effective. But when you hear grinding, smell burning, or see the breaker trip, stop and call someone. The cost of ignoring those signs is always higher than the cost of a diagnostic visit.
— Ernie M
Upright Construction & HVAC is ready to help with your blower motor
Upright Construction & HVAC has served Los Angeles homeowners for over 15 years, and blower motor inspections are one of the most common calls we handle. Whether your motor needs a thorough cleaning, a capacitor swap, or a full replacement, our technicians diagnose the actual problem before recommending any repair.

We offer 24/7 support because HVAC problems do not follow business hours. If you are hearing unusual noises, noticing weak airflow, or just want a professional set of eyes before summer hits, we are ready to help. Check out our guide to common HVAC repair challenges or schedule a service visit directly with our team. Keeping your blower motor healthy is one of the best investments you can make in your home’s comfort.
FAQ
How often should I perform HVAC blower motor maintenance?
Inspect and clean the blower motor at least once a year, ideally before cooling season in spring. Replace air filters every 30–60 days in homes with pets or dust.
Can I lubricate my blower motor myself?
Yes, if your system has a PSC motor with visible oil ports. Apply 3–5 drops of SAE 10 or SAE 20 non-detergent electric motor oil annually. ECM motors are sealed and require no lubrication.
What does a bad blower motor sound like?
Grinding, squealing, or rattling noises point to bearing wear or debris. A burning smell signals electrical overheating. Both require shutting the system off and calling a technician.
Is a noisy blower motor always a sign of motor failure?
Not always. Noise from debris hitting the wheel clears up after cleaning. Persistent grinding or squealing after cleaning points to bearing wear, which requires motor replacement.
How do I know if my capacitor or motor has failed?
A failed capacitor reads more than 6% below its rated µF value on a multimeter. Capacitor failure commonly mimics motor failure, so testing the capacitor first saves significant repair costs.