Our Services
Your Home Weatherization Checklist for Efficiency
Optimize your home's energy use with this essential six-step weatherization checklist. Save on heating and cooling costs today!
- CSLB C-20 Licensed
- NATE Certified
- EPA 608 Certified
- Licensed & Insured
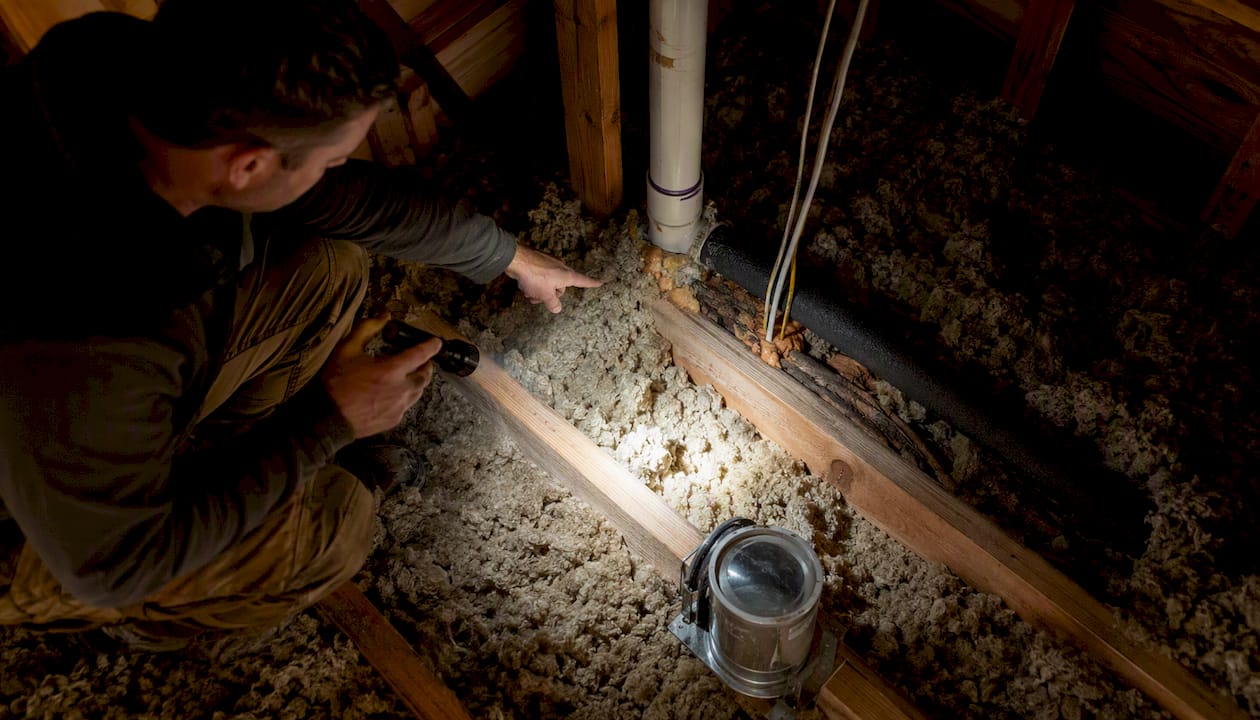
Here is your six-step weatherization checklist for efficiency, backed by the U.S. Department of Energy: (1) seal air leaks first, (2) inspect and add attic insulation, (3) seal and insulate ducts, (4) weatherstrip doors and windows, (5) check combustion appliance ventilation and CO safety, and (6) schedule a professional audit if problems persist. The DOE confirms that sealing uncontrolled leaks can cut heating and cooling costs by about 10% to 20%. ENERGY STAR, the Building Performance Institute (BPI), and RESNET all point to the same starting place: stop the air movement before you add insulation.
Quick-start checklist (print and carry room to room):
- Seal attic top plates and rim joists with spray foam (45–60 min, high impact)
- Caulk around window and door frames, interior and exterior (30 min per window)
- Weatherstrip exterior doors until you feel no daylight gap (15–20 min per door)
Pro Tip: Air sealing is the “windbreaker” layer. Insulation without sealing is like wearing a sweater with no jacket in the wind — you still feel the cold.
Key Takeaways
Sealing air leaks first, then adding insulation, is the single most cost-effective sequence a homeowner can follow to cut heating and cooling costs by 10%–20%.
| Point | Details |
|---|---|
| Air seal before insulating | Seal attic top plates, rim joists, and penetrations first; insulation alone won’t stop air movement. |
| Ducts matter as much as walls | Seal duct joints with mastic and insulate to R-6 minimum in unconditioned spaces. |
| Combustion safety is non-negotiable | After major sealing, test combustion appliances for backdrafting; install CO detectors on every level. |
| Call a BPI or RESNET auditor for persistent problems | Blower-door and infrared testing find what DIY methods miss and unlock utility rebate programs. |
| Upright Construction & HVAC | Serves Los Angeles homeowners with HVAC diagnostics, duct sealing, and attic insulation upgrades. |
How to run a room-by-room weatherization walkthrough
Work from the top of the house down. The biggest, hardest-to-see leaks live at attic and basement interfaces, recessed light penetrations, and rim joists. These spots act like open chimneys for conditioned air.
Attic (high priority)
- What to check: Top plates, attic hatch, recessed lights, plumbing and wiring penetrations
- How to detect: Look for dirty or discolored insulation (a sign air is moving through it), feel for drafts on a windy day
- Material: Two-part spray foam for large gaps; acoustical caulk for small penetrations
- Time: 1–3 hours depending on attic size
- R-value target: R-38 to R-60 for most U.S. climate zones (DOE/ENERGY STAR guidance)
Rim joists and basement/crawlspace (high priority)
- What to check: The wood framing where the floor meets the foundation wall
- Material: Cut-and-cobble rigid foam board plus spray foam to seal edges; aim for R-15 minimum
- Time: 2–4 hours for a typical basement perimeter
Ducts (high priority)
Leaky ducts can waste a significant share of your HVAC output before conditioned air ever reaches a room. ENERGY STAR duct guidance recommends sealing all accessible joints with mastic sealant or metal-backed tape, then insulating ducts in unconditioned spaces to at least R-6.
Windows and doors (medium priority)
- What to check: Visible daylight gaps, rattling sashes, cracked glazing compound
- Material: Rope caulk for seasonal use; silicone or latex-acrylic caulk for permanent seals; foam or V-strip weatherstripping for door gaps
- Time: 15–30 min per opening
- See the weatherstripping guide for step-by-step door and window details
Electrical outlets and switch plates on exterior walls (low priority)
- What to check: Cold air coming through covers on outside-facing walls
- Material: Pre-cut foam gaskets (under $5 per pack)
- Time: 5 min per outlet
Stat to know: Floors, walls, and ceilings together account for the largest share of home heat loss, and ENERGY STAR estimates that sealing and insulating can save up to 20% on heating and cooling costs.
How do you find air leaks yourself before calling a pro?
The simplest reliable test is a smoke test. Light an incense stick or use a smoke pen and hold it near suspected leak points — gaps around window frames, the attic hatch perimeter, electrical outlets, and the base of interior walls. Watch which direction the smoke moves.
Step-by-step DIY leak detection:
- Close all windows, exterior doors, and fireplace dampers.
- Turn on all exhaust fans (kitchen, bathrooms) to depressurize the house slightly — this amplifies drafts.
- Walk the perimeter of each room with a lit incense stick, moving slowly near baseboards, window frames, and door frames.
- In the attic, look for dirty or gray-streaked insulation — air filtering through insulation leaves a visible stain.
- In the basement, check rim joists for daylight gaps and feel for cold air on a cool day.
- At electrical outlets on exterior walls, remove the cover plate and probe gently with a flashlight. Turn off the circuit breaker first.
Red flags that require a professional:
- Soot streaks near your furnace, water heater, or fireplace
- Chronic condensation on interior walls or windows in winter
- Any sign of furnace backdrafting (smell of combustion gases indoors)
Pro Tip: A DIY walk-through finds a lot, but a blower-door test measures total leakage precisely and shows a thermal camera exactly where the cold air enters. No smoke stick can do that.
The DOE weatherization job aids used by trained crews follow a similar walk-through sequence, which tells you this method is the same one professionals start with.
What materials and tools do you actually need?
Essential tools and PPE:
- Caulk gun, utility knife, putty knife
- Safety glasses, work gloves, N95 dust mask (required for any insulation work)
- Flashlight or headlamp
- Stud finder (for locating wall cavities)
- High-temp (red) silicone caulk for flue pipe penetrations — standard caulk will fail near heat
One warning: Never use standard spray foam around metal flue pipes or chimneys. Use only listed high-temperature sealant in those areas. The ENERGY STAR DIY guide covers this specifically.
Typical DIY material costs run $50–$200 for a full door/window/outlet pass. Attic air sealing with spray foam and blown-in insulation top-up can run $300–$800 DIY, versus $1,500–$3,500 professionally installed. The FEMP home energy checklist also recommends setting your water heater to 120°F and insulating hot water pipes — both under $30 in materials.
Safety first: combustion appliances, ventilation, and moisture
Sealing alone is not enough. A tighter house changes how air moves, and that can starve combustion appliances of the air they need to draft safely. This is the part most DIY guides skip.
Combustion appliance safety checklist:
- Check your furnace, water heater, and gas dryer for soot marks around the burner or flue connection — soot means spillage
- Confirm the flue pipe is intact and properly connected at every joint
- Install CO detectors on every level of the home, within 10 feet of each sleeping area
- Never seal the combustion air supply opening for an atmospherically vented appliance
- After major sealing work, run all exhaust fans simultaneously and check whether the furnace flame flickers or pulls backward — that is backdrafting
The rule professionals follow: After significant air sealing, combustion-safety testing is not optional. Tightening a home can change draft behavior and create dangerous backdrafting conditions. If you have gas or oil appliances, a certified auditor should perform combustion-safety testing after any major sealing project.
Pro Tip: Never block soffit vents when adding attic insulation. Install rafter baffles (also called vent chutes) to keep the airway open from soffit to ridge. Blocking them traps moisture and can rot your roof deck.
For a deeper look at balancing sealing with fresh-air supply, the home ventilation guide covers mechanical ventilation options clearly.
When should you hire a professional energy auditor?
Call a pro when you find persistent drafts after DIY sealing, any sign of combustion problems, or when you want verified savings before a major insulation investment. Professional audits use tools no homeowner carries.
What a professional audit includes:
- Blower-door test — depressurizes the house to measure total air leakage in CFM50 (cubic feet per minute at 50 pascals)
- Duct leakage test — measures how much conditioned air your duct system loses before it reaches living spaces
- Infrared thermal scan — shows cold spots, missing insulation, and hidden moisture with a thermal camera
- Combustion safety testing — checks draft, CO levels, and appliance operation under depressurized conditions
- Written report — lists findings, prioritized recommendations, and estimated savings
Certifications to ask for:
- BPI Building Analyst (Building Performance Institute) — the standard for whole-house diagnostics
- RESNET HERS Rater — rates your home’s energy use on a standard index
- Home Performance with ENERGY STAR contractor — combines BPI standards with ENERGY STAR program oversight
Many utilities offer reduced-cost or free audits through local programs. Ask your utility provider before you pay full price. For HVAC-specific diagnostics that often surface during audits, reviewing common HVAC repair challenges helps you understand what a technician may flag.
Savings reference: The DOE confirms that a DIY walk-through identifies many obvious leaks, and that sealing them can save 10%–20% on heating and cooling.
How do you prioritize projects and build a realistic timeline?
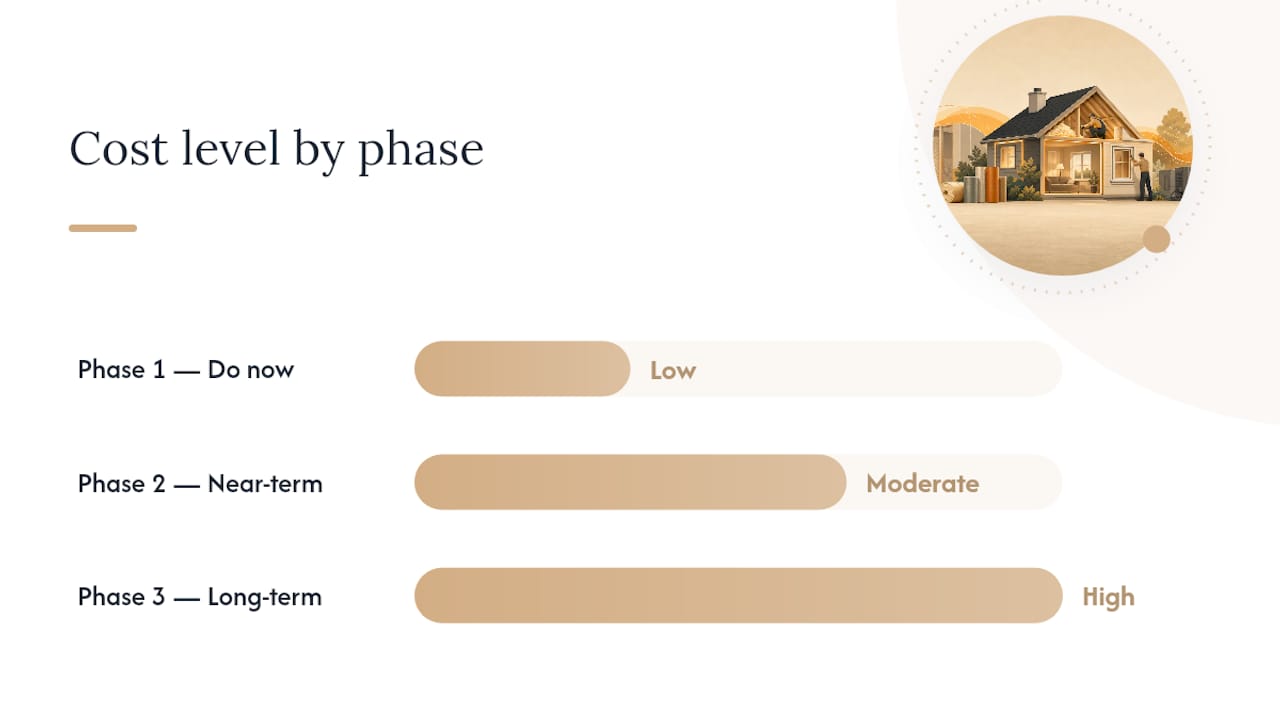
Start with what costs the least and saves the most. The Energy Saver guide recommends sequencing projects in three phases.
Phase 1 — Do now (DIY, low cost, high return):
- Seal attic top plates, plumbing penetrations, and recessed lights with spray foam
- Caulk window and door frames
- Weatherstrip exterior doors
- Add foam gaskets behind outlet covers on exterior walls
- Set water heater to 120°F; insulate first 6 feet of hot water pipes
Phase 2 — Near-term (hire a pro, moderate cost):
- Dense-pack wall insulation (professional blower required)
- Duct sealing and insulation by an HVAC contractor
- Attic insulation top-up to recommended R-value
Phase 3 — Long-term investment:
- Window replacement (high cost, moderate energy return — do this last)
- HVAC system replacement when equipment reaches end of life
Check with your local utility and look into federal tax credits for insulation and HVAC upgrades — these can offset Phase 2 and 3 costs meaningfully. For a full HVAC maintenance plan that pairs well with weatherization, the HVAC maintenance checklist lays out what to inspect each season.
A note from Ernie M on what I always tell Los Angeles homeowners
When I walk a home in Los Angeles, the first thing I do is head to the attic. Not the windows, not the doors — the attic. That’s where most of the conditioned air escapes, and it’s also where I find the most surprises: gaps around recessed lights the size of your fist, plumbing chases open to the outside, insulation that’s been sitting there since the 1980s with an R-value that barely qualifies as insulation anymore.
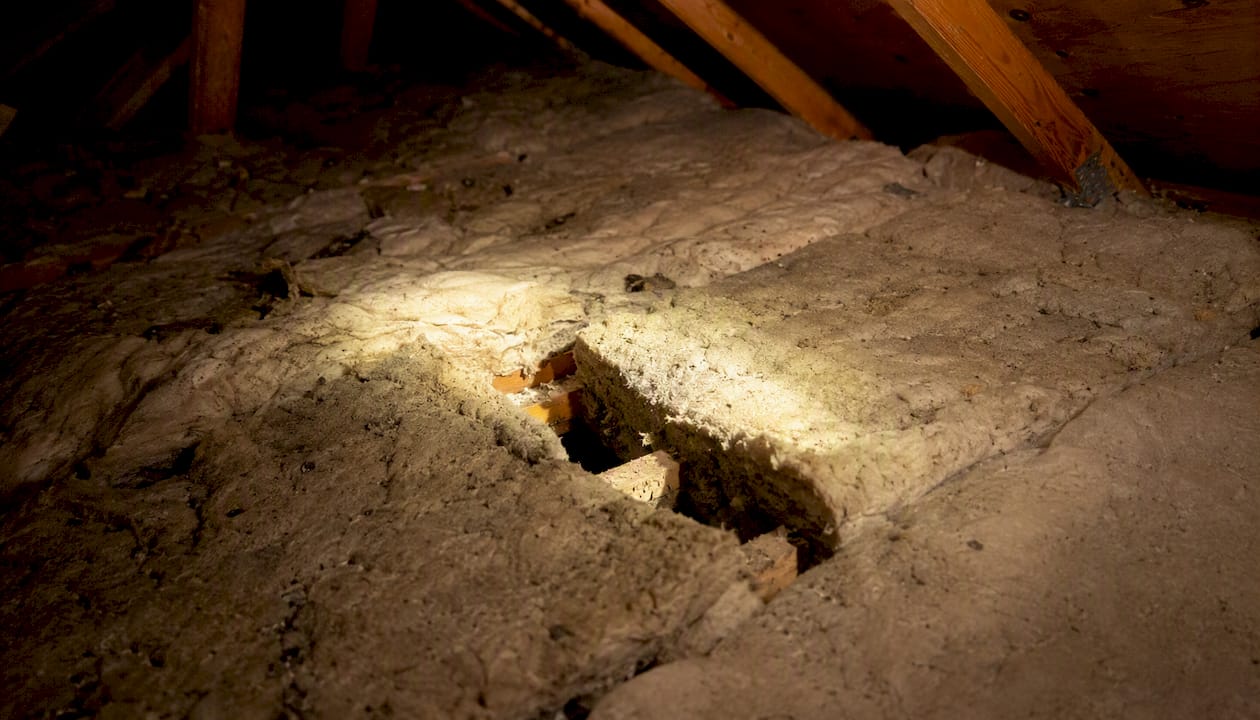
My honest advice: grab a flashlight and spend 20 minutes up there before you spend a dollar on new windows. Seal the big gaps first. Everything else is secondary. If you find combustion issues or you’re not sure what you’re looking at, don’t guess. Call us. That’s what we’re here for.
Upright Construction & HVAC serves Los Angeles homeowners who want real results
Weatherization done right means HVAC diagnostics, duct sealing, and attic insulation upgrades handled by people who know Los Angeles homes. Upright Construction & HVAC brings 15+ years of local experience, 24/7 emergency response, and transparent diagnostics to every job.

When your weatherization walk-through turns up duct leaks, an aging furnace, or combustion concerns, you need a licensed contractor who can act the same day. Upright Construction & HVAC covers the greater Los Angeles area for HVAC repair and diagnostics, duct sealing, attic insulation retrofits, and full energy-efficiency upgrades. Financing is available for larger projects. Request your estimate today and find out exactly what your home needs.
Sources
Key federal and authoritative resources for deeper guidance:
- A DO-IT-YOURSELF GUIDE TO SEALING AND INSULATING WITH ENERGY STAR
- Saving Energy in Your Home: Insulation (Purdue Extension)
- Home air sealing checklists (BASC / PNNL)
FAQ
How much can weatherization actually save on energy bills?
The DOE estimates that sealing uncontrolled air leaks can save 10%–20% on heating and cooling costs. ENERGY STAR puts the ceiling at about 20% when sealing and insulation improvements are combined.
What is the difference between a BPI auditor and a RESNET HERS rater?
A BPI Building Analyst focuses on whole-house diagnostics, combustion safety, and retrofit recommendations. A RESNET HERS Rater scores your home’s energy use on a standardized index, which is useful for comparing homes or qualifying for financing programs.
Can I weatherize my home myself, or do I need a contractor?
Most air sealing and weatherstripping tasks are safe DIY work. Duct sealing, dense-pack wall insulation, and any work near combustion appliances should involve a licensed contractor, especially after significant sealing that could affect appliance draft.
What is a blower-door test and when do I need one?
A blower-door test depressurizes your home to measure total air leakage precisely. You need one when DIY sealing hasn’t resolved drafts, before a major insulation investment, or when combustion appliances are present and you want verified safety data.
Does Upright Construction & HVAC handle weatherization work in Los Angeles?
Yes. Upright Construction & HVAC provides HVAC diagnostics, duct sealing, attic insulation upgrades, and full energy-efficiency retrofits for homeowners across the greater Los Angeles area, with 24/7 availability for urgent issues.
Recommended
Ready to get started?
Licensed, insured & available 24/7 across Los Angeles and the San Fernando Valley.